For those who have watched the podcast here is the spreadsheet for you to download.
PLEASE NOTE: This is not supposed to be a thorough pricing model for businesses and should not be taken as advice. This is simply a visual aid to help give rough ball parks and help you understand business. In addition, I did not include discussions about GST. I really should have so, please add this into your calculations if you are registered.
The post How To Price a Lawn Mowing Round appeared first on Silverstone Gardening.
]]>Indian Hawthorn, also known as Raphiolepis, is a versatile and popular shrub. This evergreen plant is popular for its attractive foliage, beautiful flowers, and low maintenance requirements. In this article, we will discuss everything you need to know about Indian Hawthorn, including its characteristics, growing conditions, and care tips.
Popular Varieties in Australia
Indian Hawthorn (Raphiolepis) boasts several varieties, each with its unique attributes. Among the most popular in Australia are ‘Oriental Pearl,’ ‘Springtime,’ and ‘Pink Lady.’ These varieties are favored for their compact size, vibrant flowers, and disease resistance. Whether you’re seeking a hedge, border plant, or standalone specimen, there’s likely an Indian Hawthorn variety to suit your needs.

Growing Conditions of Indian Hawthorn (Raphiolepis)
Indian Hawthorn (Raphiolepis) thrives in a variety of growing conditions, making it a versatile and low-maintenance plant for gardens and landscapes. This hardy shrub prefers full sun to partial shade and well-drained soil. It can tolerate a range of soil types, including clay, loam, and sandy soils. Indian Hawthorn is also drought-tolerant once established, making it a great choice for dry or arid climates.
Height and Growth Rate of Indian Hawthorn
Indian Hawthorn (Raphiolepis) is a relatively slow-growing plant, typically adding about 15 to 30 cm of growth per year. It may take several years for the plant to reach its full height. Typically, Indian Hawthorn (Raphiolepis) grows to a height of 1 to 2 meters, with a similar spread, making it an ideal choice for various garden settings.

Is Hawthorn Fast Growing?
Hawthorn trees are not fast-growing. They have a moderate growth rate, adding about 30-60 cm per year under optimal conditions. This slow and steady growth rate allows for Indian Hawthorn to establish strong roots and a sturdy structure, making it a long-lasting and resilient addition to any garden. Additionally, its slow growth rate means less maintenance in terms of pruning and shaping, as it will not quickly outgrow its designated space.
Daily Sunlight Requirements of Indian Hawthorn
In order to ensure the health and vitality of Indian Hawthorn, it is important to plant it in a location that receives adequate sunlight. By providing at least 6 hours of sunlight each day, you can enjoy a lush and vibrant plant that will enhance the beauty of your garden. With its slow growth rate and minimal maintenance requirements, Indian Hawthorn is a low-maintenance and attractive choice for any landscape.
Where Is the Best Place to Plant Indian Hawthorn?
The best place to plant Indian Hawthorn (Raphiolepis) is in a location that receives full sun to partial shade and has well-draining soil. Indian Hawthorn will thrive in these conditions and reward you with beautiful blooms and healthy foliage. It is also important to make sure the area is not prone to standing water, as this can lead to root rot and other issues. Additionally, planting Indian Hawthorn near other shrubs and plants that have similar sunlight and water requirements can help create a cohesive and visually appealing landscape. With the right care and placement, Indian Hawthorn can be a stunning addition to any garden.

Can You Plant Hawthorn Next to a House?
Yes, Indian Hawthorn can be planted near a house. However, it’s important to consider its mature size and growth habit to ensure it won’t interfere with structures or utilities. Indian Hawthorn typically grows to be around 1-2 meters tall and wide, so it is generally safe to plant near a house as long as there is enough space for it to grow without causing any issues.
Are Indian Hawthorn Considered Drought-Tollerant?
Indian Hawthorn has moderate drought tolerance once established, but it is still important to provide them with adequate moisture during dry spells.
How Much Water Does Indian Hawthorn Need Each Week?
India Hawthorns once established, will do well on about 20mm of water each week. However, this is dependent on weather and soil quality. Increase watering during hot and dry spells
Overwatering can lead to root rot, so it is important to allow the soil to dry out slightly between waterings. Additionally, adding a layer of mulch around the base of the plant can help retain moisture and regulate soil temperature. Proper watering practices will help ensure healthy growth and vibrant flowering of Indian Hawthorn plants.
Pruning Requirements of Indian Hawthorn
You should prune Indian Hawthorn (Raphiolepis) regularly to maintain its shape and promote healthy growth. The best time to prune is after flowering, usually in late spring or early summer. Use sharp pruning shears to remove dead or damaged branches and to shape the plant as desired (if you are looking for some really good shears here are two great options depending on your budget, option 1 or option 2). It is important to avoid over-pruning, as this can stress the plant and inhibit future growth. Should you accidentally over-prune your Indian Hawthorn or something similar occurs, this product helps the plant become more resilient to stress.
When pruning, make sure to cut at a 45-degree angle just above a bud or lateral branch. This will help encourage new growth and maintain the plant’s overall health. Regular pruning will also help improve air circulation and prevent disease. By following these pruning guidelines, your Indian Hawthorn plant will continue to thrive and flourish year after year.

What is the Best Soil Type for Indian Hawthorn
Indian Hawthorn (Raphiolepis) prefers well-draining soil rich in organic matter. To improve the soil for Indian Hawthorn, consider mixing in compost or peat moss to increase the organic content and improve drainage (if you just need a small amount of compost, this is a great option, if you need a larger quantity, the best option is to contact your local soil supplier). Avoid heavy clay soils that can retain too much water and lead to root rot. Adding a layer of mulch around the base of the plant can also help retain moisture and suppress weeds.
How to improve soils for healthy Indian Hawthorn
- To improve sandy soil, add compost or well-rotted manure to enhance water retention and nutrient content. This will help create a more balanced environment for the Indian Hawthorn to thrive. Additionally, regular fertilisation with a balanced fertiliser can help provide essential nutrients for healthy growth.
- For clay soil, mixing in compost or peat moss can also help break up clay soil and improve its structure for Indian Hawthorn. Additionally, adding gypsum can further improve drainage and prevent water logging.
Fertilisation Needs of Indian Hawthorn
You should fertilise your Indian Hawthorn (Raphiolepis) to promote healthy growth and blooming. A balanced, slow-release fertiliser specifically formulated for acid-loving plants can be applied in early spring and again in late summer. (Here is a great balanced organic fertiliser that can be used on just about every plant.) Be sure to follow the instructions on the fertiliser package for the correct application rate. Over-fertilising can lead to excessive growth and decreased flowering. Additionally, incorporating organic matter into the soil can provide natural nutrients for the plant. Regularly monitoring the plant’s growth and adjusting the fertilisation schedule as needed will help ensure the health and vitality of the Indian Hawthorn.

What Is the Best Fertiliser for Indian Hawthorn?
A balanced fertiliser formulated for flowering shrubs is best for Indian Hawthorn (Raphiolepis). Apply the fertiliser according to the manufacturer’s instructions in early spring before new growth begins. This will help promote healthy growth and abundant flowering throughout the growing season.
It is important to avoid using high-nitrogen fertilisers, as this can result in excessive leaf growth at the expense of flowers. Likewise, be sure to water the plant thoroughly after fertilising to help distribute the nutrients evenly and prevent burning the roots. By following these guidelines, you can help your Indian Hawthorn thrive and bloom beautifully year after year.
Pests and Diseases Common to Indian Hawthorn (Raphiolepis)
Indian Hawthorn (Raphiolepis) is relatively pest and disease-resistant but can be susceptible to aphids, scale insects, and fungal diseases such as powdery mildew. Treat pests with insecticidal soap or neem oil (here is where you can find some neem oil) and fungal diseases with a fungicide labeled for ornamental plants.
How Do I Know If My Plant Has a Bacterial or Fungal Infection?
Signs of a bacterial or fungal infection in Indian Hawthorn (Raphiolepis) include yellowing or browning of leaves, leaf spots, wilting, and dieback of branches. You may also notice a white or grayish powdery coating on the leaves, which is a common sign of powdery mildew.
How Do You Get Rid of Fungus on Indian Hawthorn?
To get rid of fungus on Indian Hawthorn (Raphiolepis), prune affected branches to improve air circulation, and remove fallen leaves to reduce the spread of spores. Spray the fungicide on both sides of the leaves, following the manufacturer’s instructions. This organic fungicide will help with powdery mildew and black spots. Note that the best time to apply fungicide is in early spring before new growth appears.

What Is the Best Fungicide for Leaf Spot?
The best fungicide for leaf spot will depend on the specific type of fungus causing the issue. Some common fungicides used for leaf spots include copper-based fungicides, neem oil, and sulfur-based fungicides. It is important to carefully read and follow the instructions on the fungicide label to ensure proper application and effectiveness in treating the leaf spot fungus. Additionally, practicing good garden hygiene, such as removing affected plant debris and maintaining proper spacing between plants, can help prevent the spread of leaf spot fungus in the future.
How Do You Treat Hawthorn Leaf Blight?
Hawthorn leaf blight is a fungal disease that affects the leaves of hawthorn trees, causing them to develop dark spots and eventually turn yellow or brown. To treat hawthorn leaf blight, it is important to prune affected branches, remove fallen leaves, and apply a fungicide specifically designed to target leaf blight. Copper-based fungicides or those containing chlorothalonil are effective options for treating this disease. It is also important to follow the manufacturer’s instructions for application and timing to ensure the best results. Leaf blight can weaken the overall health of the tree if left untreated, so it is important to address the issue promptly.
How Do You Prevent Leaf Spot Disease?
To prevent leaf spot disease, avoid overhead watering and overcrowding plants. Provide good air circulation around the plant by pruning regularly. Removing and disposing of infected leaves can also help prevent the spread of leaf spot disease. It is important to practice good garden sanitation by cleaning up fallen leaves and debris regularly. Additionally, planting disease-resistant varieties can help reduce the risk of leaf spot disease in your garden.
What Bacteria Causes Leaf Spot Disease?
The bacteria Pseudomonas Syringae is a common cause of leaf spot disease in Indian Hawthorn. This bacteria thrives in moist environments, making overhead watering a common culprit in the spread of leaf spot disease. By following the preventative measures mentioned earlier, such as avoiding overhead watering and providing good air circulation, you can help protect your Indian Hawthorn from this destructive bacteria. In addition, regularly inspecting your plants for signs of infection and promptly removing any infected leaves can help stop the spread of the disease before it becomes a larger issue. By taking these precautions, you can keep your garden healthy and thriving.

Propagating your Hawthorns
You can propagate hawthorn from seed, but it is more commonly propagated from hardwood cuttings taken in late winter or early spring. To propagate your Indian Hawthorn, choose a healthy branch and cut a 6-8 inch section, making sure to include at least 2-3 nodes. Remove the lower leaves and dip the cut end in rooting hormone before planting it in a well-draining potting mix. (We recommend using this rooting hormone to help root formation in your cuttings.) Keep the cutting moist and in a warm, sunny spot until roots develop, then transplant it into the garden. With proper care and attention, you can easily propagate new Indian Hawthorns to add to your garden or share with friends and family.
FAQs Answered
Are Hawthorn Trees Lucky?
In some cultures, hawthorn trees are considered symbols of good luck and protection. They are often planted near homes or used in rituals to ward off evil spirits. Hawthorn trees are also believed to have healing properties and are used in traditional medicine to treat various ailments. The berries of the hawthorn tree are also said to bring good fortune and are often used in rituals for luck and prosperity. Overall, hawthorn trees are seen as a positive and beneficial presence in many cultures around the world.
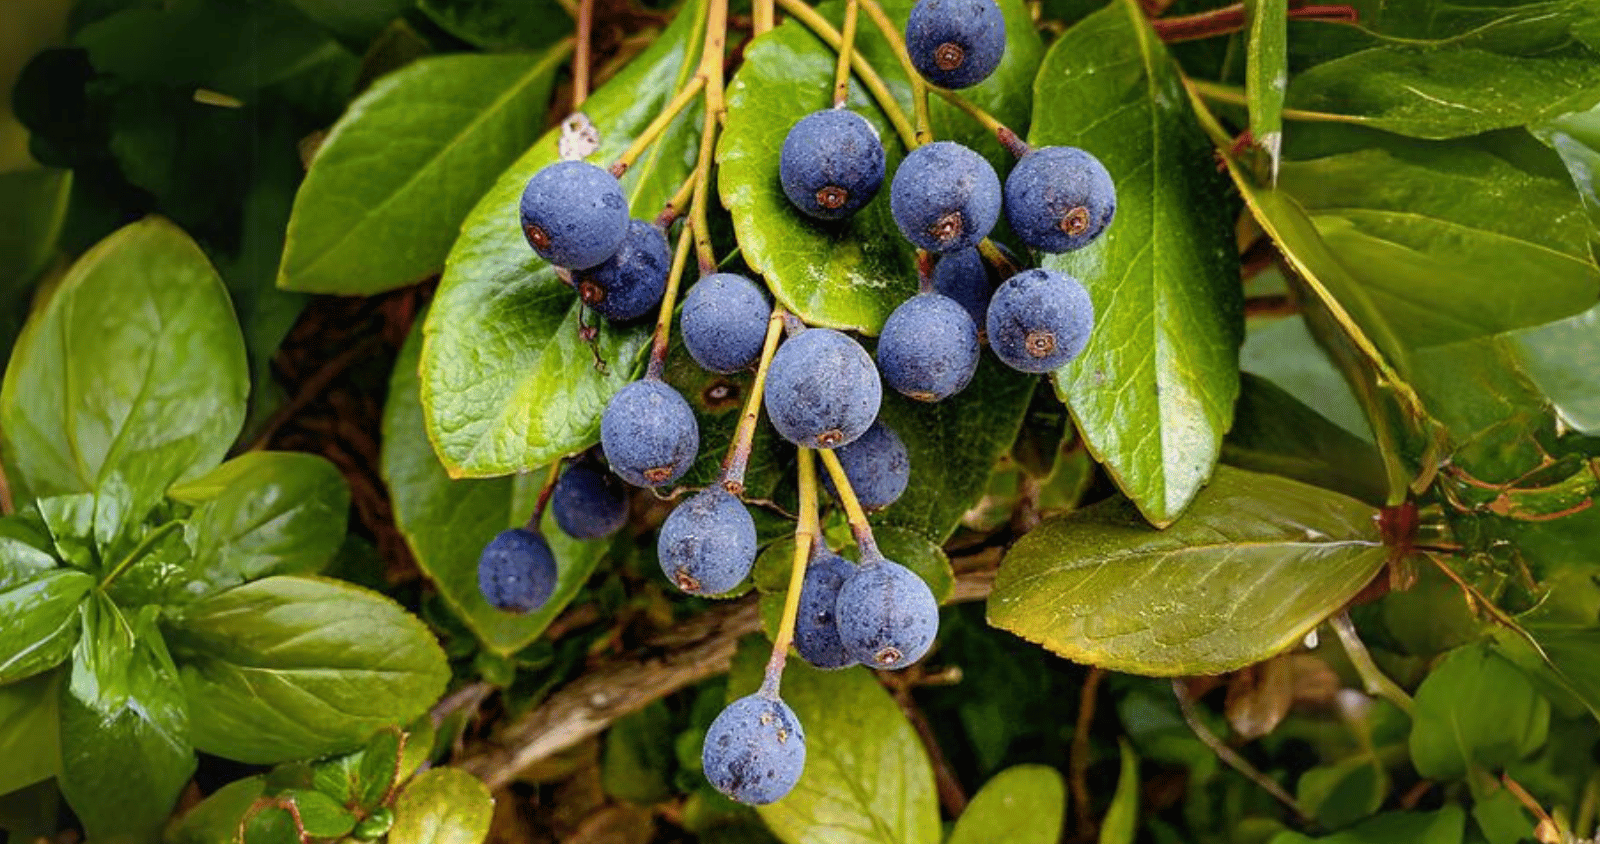
Can You Eat Hawthorn Berries?
Indian Hawthorn berries are not typically considered edible for humans. While they are not necessarily toxic, they can cause stomach upset if consumed in large quantities. However, some birds and wildlife do eat Indian Hawthorn berries as part of their diet. It is best to avoid eating these berries and instead appreciate the beauty of the tree and its symbolic significance.
What Is the Indian Hawthorn Used For?
Gardeners commonly use Indian Hawthorn (Raphiolepis) in landscaping for its ornamental qualities. It is often planted as a hedge, border plant, or standalone specimen in gardens and public spaces. Additionally, some varieties are suitable for use as bonsai trees. Indian Hawthorn can also attract butterflies and other pollinators, making it a popular choice for butterfly gardens. The plant’s fragrant flowers and colorful berries add beauty to any outdoor space. In traditional medicine, Indian Hawthorn is believed to have anti-inflammatory properties and is used to treat various ailments such as digestive issues and heart conditions. Overall, Indian Hawthorn is a versatile plant that adds aesthetic appeal and practical benefits to any landscape.
What Are the Medicinal Benefits of Hawthorn Leaves? Which Hawthorn Tree Is Medicinal?
While Indian Hawthorn is commonly used in traditional medicine for its potential anti-inflammatory properties, it is important to note that more research is needed to fully understand its medicinal benefits. Some studies have shown that Indian Hawthorn may have potential cardiovascular benefits, such as improving heart health and circulation. However, it is always best to consult with a healthcare professional before using any plant for medicinal purposes. Additionally, Indian Hawthorn should not be used as a substitute for prescribed medications or treatments without the guidance of a healthcare provider.
What Does Hawthorn Smell Like?
Indian Hawthorn has a unique scent that is often described as sweet and floral, with hints of citrus and spice. The fragrance is pleasant and can be quite calming, making it a popular choice for aromatherapy and natural remedies. Mostly, the smell of Hawthorn is refreshing and uplifting, making it a welcome addition to any home or garden.

Is Hawthorne a Tree or Bush? Is Hawthorn the Same as Cherry Blossom?
Hawthorn can refer to either a tree or a bush, depending on the species and variety. While hawthorn and cherry blossom are both flowering trees, they belong to different genera. Hawthorn belongs to the genus Crataegus, while cherry blossom belongs to the genus Prunus.
What Is the Smallest Indian Hawthorn?
One of the smallest varieties of Indian Hawthorn (Raphiolepis) is the ‘Oriental Pearl,’ which grows to a height of around 60-80 cm with a similar spread. This compact size makes it ideal for smaller gardens or for use as a low-border plant.
What Can I Plant Next to the Indian Hawthorn?
Indian Hawthorn (Raphiolepis) pairs well with a variety of plants, including other shrubs, perennials, and annuals. Consider planting it alongside other low-maintenance plants that have similar soil and sunlight requirements.
What can I plant next to Indian hawthorn?
Indian Hawthorn (Raphiolepis) is a versatile plant that can be paired with a variety of other shrubs, perennials, and annuals to create a beautiful garden landscape. When choosing plants to pair with Indian Hawthorn, consider selecting low-maintenance options that require similar soil and sunlight conditions to ensure they thrive together.
What Is the Lifespan of a Hawthorn Tree?
As for the lifespan of a hawthorn tree, they are known to have a long lifespan, ranging from 50 to 150 years or even longer, depending on the specific species and growing conditions. Their longevity makes them a great investment for any garden or landscape design.
Do Hawthorn Trees Have Deep Roots?
Hawthorn trees have a shallow root system that spreads wide rather than deep. This makes them sensitive to changes in soil moisture and compaction. To promote healthy growth, avoid planting hawthorn trees in compacted or waterlogged soils. Instead, choose well-draining soil and provide regular watering during dry periods. Additionally, be mindful of any construction or excavation near the trees, as their shallow roots can be easily damaged. Proper care and maintenance can help extend the lifespan of hawthorn trees and ensure they thrive in your garden for years to come.
Why Are My Hawthorn Leaves Turning Brown? What Causes Yellow Leaves on Indian Hawthorn?
Hawthorn leaves may turn brown due to environmental stress, such as insufficient watering or extreme temperatures. Nutrient deficiencies, poor soil drainage, or pest infestations can all result in yellow leaves on Indian Hawthorn (Raphiolepis).
What Are Common Hawthorn Problems?
Common problems with hawthorn trees include pests such as aphids and diseases such as leaf spot and fire blight. Regular monitoring and proper care can help prevent these issues and keep your hawthorn trees healthy. In addition to pests and diseases, hawthorns may also face challenges like powdery mildew and rust. It is important to address these problems promptly to ensure the continued health and vitality of your hawthorn trees. By staying vigilant and providing the necessary care, you can enjoy the beauty of these trees in your garden for many years to come.
What Are the Disadvantages of Hawthorn Trees?
While hawthorn trees are popular for their ornamental qualities and wildlife value, they can also be susceptible to pests and diseases. Additionally, some species of hawthorn produce thorns, which can be a drawback in a landscape setting.
Indian Hawthorn (Raphiolepis) is a beautiful and versatile shrub that can add year-round interest to your garden. With proper care and maintenance, it can thrive in a variety of conditions and provide you with years of enjoyment. Whether you’re a beginner or an experienced gardener, Indian Hawthorn (Raphiolepis) is a great option for adding beauty and interest to your outdoor space.
The post Everything You Need To Know About Indian Hawthorn (Raphiolepis) appeared first on Silverstone Gardening.
]]>Where Does Radermachera Summerscent Come From?
Radermachera summerscent is native to Asia, particularly regions with tropical climates. It is popular for its compact growth habit and attractive foliage, making it a popular choice for gardens and indoor spaces worldwide.

Varieties and Popularity in Australia
Radermachera, commonly known as China Doll or Emerald Tree, is a popular choice for gardens and indoor spaces due to its lush foliage and compact size. In Australia, the most popular varieties are Radermachera sinica and Radermachera summerscent, known for their vibrant green leaves and elegant appearance. These varieties are well-suited to Australian climates, thriving in both indoor and outdoor settings.
Gardeners often use it as an ornamental plant in gardens, landscaping, and even as indoor houseplants, adding a touch of elegance and beauty to any space. Radermachera is also valued for its low maintenance requirements, making it an ideal choice for both experienced and novice gardeners. With its ability to thrive in a variety of conditions and its stunning appearance, it is no wonder that Radermachera has become a popular choice among Australian gardeners.
Size and Growing Conditions
Radermachera can grow up to 2-3 meters in height, making it ideal for small gardens or as a potted plant. It thrives in well-draining soil with a slightly acidic pH and prefers bright, indirect sunlight (to find out what your soil PH is use this kit). While it is best suited to warm, tropical climates, Radermachera can also adapt to cooler temperatures if protected from frost.
Is Radermachera Fast-Growing?
Radermachera is considered moderately fast-growing, especially during the growing season when provided with proper care and conditions. Its growth rate can be accelerated with regular fertilization and pruning to encourage new growth. With its lush foliage and attractive flowers, Radermachera can quickly fill out a space and create a beautiful focal point in any garden. Gardeners who are looking for a low-maintenance plant that adds a touch of tropical flair to their outdoor space often choose Radermachera for its easy care and quick growth.
How Big is Radermachera Summerscent?
Radermachera summerscent typically grows to a height of 2-3 meters, making it slightly smaller than some other varieties of Radermachera. Despite its smaller size, Radermachera summerscent still has the ability to make a big impact in any garden or outdoor space. Its compact nature makes it a versatile plant that can be easily incorporated into a variety of landscaping designs. Whether used as a standalone specimen or as part of a larger planting scheme, Radermachera summerscent is sure to bring beauty and tropical charm to any garden setting. Even though it may not reach the towering heights of other Radermachera varieties, its stunning foliage and flowers are sure to captivate all who encounter it.
Sunlight Requirements
To thrive, Radermachera requires bright, indirect sunlight. It should receive at least 4-6 hours of sunlight per day. If the plant is not getting enough light, it may become leggy, with sparse foliage and weak growth.
Can Radermachera Grow in Shade?
While Radermachera prefers bright, indirect sunlight, it can tolerate some shade. However, it may not thrive as well in low-light conditions and may become leggy with reduced foliage. If you need to place your Radermachera in a shadier spot, make sure to monitor its growth and adjust as needed. Consider supplementing with artificial grow lights if natural light is limited. Remember that while Radermachera can adapt to different light conditions, it will truly flourish with the right amount of sunlight. Ensure your plant receives the right balance of light to keep it healthy and vibrant.
Is Radermachera an Indoor Plant?
Yes, but only in very well-lit areas. Gardeners commonly grow Radermachera indoors as a houseplant due to its compact size and attractive foliage. It is well-suited to indoor environments as long as it gets enough lighting and care. Place your Radermachera next to a large window, and with 4 hours of direct sunlight, it should enjoy the spot.
Remember to water it regularly, provide adequate drainage, and keep it away from direct air conditioning as the dry, cold air is not good for the plant. Keep an eye out for any signs of distress to ensure your Radermachera remains healthy and vibrant.
Where is the best place to plant Radermachera?
Radermachera is best planted in a location that receives bright, indirect sunlight. It can be planted outdoors in a garden bed or in a pot on a patio or balcony. Indoors, it can be placed near a window with sheer curtains or in a well-lit room. The smaller size of Radermachera summerscent makes it a perfect choice for smaller gardens or outdoor spaces with limited room to grow. Its manageable height also makes it a popular choice for growing in containers on patios or balconies. Whether planted in the ground or in a pot, Radermachera summerscent is sure to add a touch of exotic beauty to any outdoor area.
Drought Tolerance and Watering
While Radermachera is not considered drought-tolerant, it does not like to sit in soggy soil. It is best to water the plant when the top inch of soil feels dry to the touch. On average, Radermachera needs about 15-30mm of water per week, but this can vary depending on the climate and soil conditions. Ensure proper drainage to prevent root rot. Overwatering can be just as damaging as underwatering, so it is important to find the right balance for your Radermachera summerscent. In hotter climates, you may need to increase watering frequency, while in cooler climates, you may need to water less often. Adding a layer of mulch around the base of the plant can help retain moisture and regulate soil temperature. By following these simple watering tips, you can help your Radermachera thrive and continue to beautify your outdoor space for years to come.
How often should I prune my Radermachera?
If you are wanting to maintain a Radermachera hedge light trimming every 4-6 weeks during the growing season will keep it in shape.
Light pruning every 3-6 months for general shrubs, trees and indoor Radermachera just to maintain shape will be enough.
How hard can I cut back my Radermachera?
Radermachera can handle a hard cut back and height reset. However, it is best to do this at the start of spring and make sure that the plant is not struggling from stresses like heat stress or root rot when doing this. Should you determine your Radermachera is experiencing heat stress, this product is great for helping with heat stress, best applied before the stress but can also help after or during a heat wave.
Best Soil For Radermachera?
Radermachera prefers well-draining soil with a slightly acidic pH. To improve the soil quality for your Radermachera summerscent, consider adding organic matter such as compost or peat moss to help retain moisture and improve drainage. Avoid using heavy, clay-based soils that can hold onto water and lead to root rot. Regularly check the soil moisture levels by sticking your finger into the soil about an inch deep – if it feels dry, it’s time to water. With the right soil type and proper watering techniques, your Radermachera will flourish and thrive in its environment.
- If your soil is too sandy, you can improve it by adding organic matter such as compost or peat moss. This will help the soil retain moisture and nutrients, promoting healthy growth for your Radermachera plant.
- For clay soil, adding perlite (here is where you can get perlite from) or sand can help improve drainage and create a more suitable environment for the plant to thrive. Regularly checking the soil moisture levels is crucial for the health of your Radermachera plant.
Fertilising Needs
Radermachera benefits from regular fertilisation during the growing season, especially if you have a very sandy soil. A balanced, water-soluble fertiliser is ideal, applied every 4-6 weeks. Be sure to follow the manufacturer’s instructions for dosage and application to avoid over-fertilizing, which can lead to nutrient imbalances and damage to the plant.
What Is the Best Fertilizer for Summerscent?
A balanced, water-soluble fertilizer formulated for indoor or outdoor plants is suitable for feeding Radermachera summerscent. Here is a great balanced organic fertiliser that can be used on just about every plant. Follow the manufacturer’s instructions for application rates and frequency to avoid over-fertilization.

Common Pests and Diseases
Pests
Common pests that can affect Radermachera include spider mites, aphids, and mealybugs. Inspect your plant regularly for any signs of pests, such as webbing, sticky residue, or small insects. If you notice any pests, treat your Radermachera with insecticidal soap or neem oil (here is where you can find some neem oil). Be sure to follow the instructions on the product label. Additionally, remember to provide proper air circulation. Avoid overwatering to prevent common diseases such as root rot and powdery mildew. Should powdery mildew appear, here is an organic fungicide that will help remove powdery mildew. With proper care and maintenance, your Radermachera summerscent should thrive and remain healthy.
Diseases
Common diseases include root rot and leaf spot. You can prevent these by avoiding overwatering and providing good air circulation around the plant. Using well-draining soil and ensuring the plant is not sitting in water for extended periods can help prevent root rot. If necessary, use fungicides to treat leaf spots. However, remember that proper watering and adequate sunlight can also help prevent this disease. By staying vigilant and proactive in caring for your Radermachera, you can help keep it healthy and thriving for years to come.

How Do You Prune Summerscent?
Pruning Radermachera Summerscent involves removing dead or overgrown branches to maintain its shape and promote healthy growth. Prune regularly to maintain its shape and size. Use sharp, clean pruning shears to make clean cuts (if you are looking for some really good shears, here are two great options depending on your budget: option 1 and option 2), and prune in late winter or early spring before new growth emerges. Avoid pruning too heavily, as this can stress the plant and affect its overall health.
Propagation
You can propagate Radermachera from stem cuttings. Take a cutting from a healthy, mature plant and place it in a pot with well-draining soil. Keep the soil moist and the cutting in a warm, bright location. Roots should start to form in a few weeks, at which point you can transplant the cutting into a larger pot or outdoors. We recommend using this rooting hormone to help root formation in your cuttings.
Common Mistakes
Three common mistakes gardeners make with Radermachera are overwatering, insufficient sunlight, and neglecting to prune regularly. By providing the right growing conditions and care, Radermachera can thrive and bring beauty to your garden or indoor space. With its stunning foliage and easy maintenance, Radermachera is a wonderful choice for both beginner and experienced gardeners alike.
- Overwatering: One of the most common mistakes gardeners make with Radermachera is overwatering. It is important to allow the soil to dry out slightly between waterings to prevent root rot. Using a well-draining potting mix and avoiding watering on a strict schedule can help prevent this issue.
- Insufficient sunlight: Radermachera plants require bright, indirect sunlight to thrive. If your plant is not receiving enough light, it may become leggy or stop growing altogether. Place your Radermachera near a window where it can receive plenty of natural light throughout the day. If necessary, consider supplementing with a grow light to ensure your plant gets the light it needs to stay healthy and vibrant.
- Neglecting to prune regularly: Neglecting to prune regularly can also lead to issues with your Radermachera plant. Regular pruning helps promote new growth. It also keeps the plant looking neat and tidy and prevents it from becoming too leggy or overgrown. It is recommended to prune your Radermachera plant every few months, trimming back any leggy or dead branches to encourage new growth.
Why Are the Leaves on My Radermachera Plant Turning Yellow?
There are a number of causes of yellowing leaves on Radermachera, including overwatering, underwatering, insufficient light, nutrient deficiencies, or pests. Properly diagnosing the underlying cause is essential to remedy the issue and restore the plant’s health. If you notice yellowing leaves on your Radermachera plant, the first step is to assess its watering schedule. Overwatering can lead to root rot and yellowing leaves, while underwatering can cause stress and nutrient deficiencies. Ensure that your plant is receiving the right amount of water based on its specific needs.
Additionally, check the plant’s light exposure, as insufficient light can also result in yellowing leaves. If necessary, move the plant to a brighter location to promote healthy growth. Nutrient deficiencies can be addressed with a balanced fertiliser specifically formulated for indoor plants. Finally, inspect the plant for any signs of pests, such as spider mites or mealybugs, which can also cause yellowing leaves. By addressing the underlying issue promptly, you can help your Radermachera plant thrive and maintain its vibrant foliage.

Benefits of Radermachera Summerscent
Radermachera Summerscent, a variety of the Radermachera plant species, offers several benefits that make it a desirable addition to any garden or indoor space.
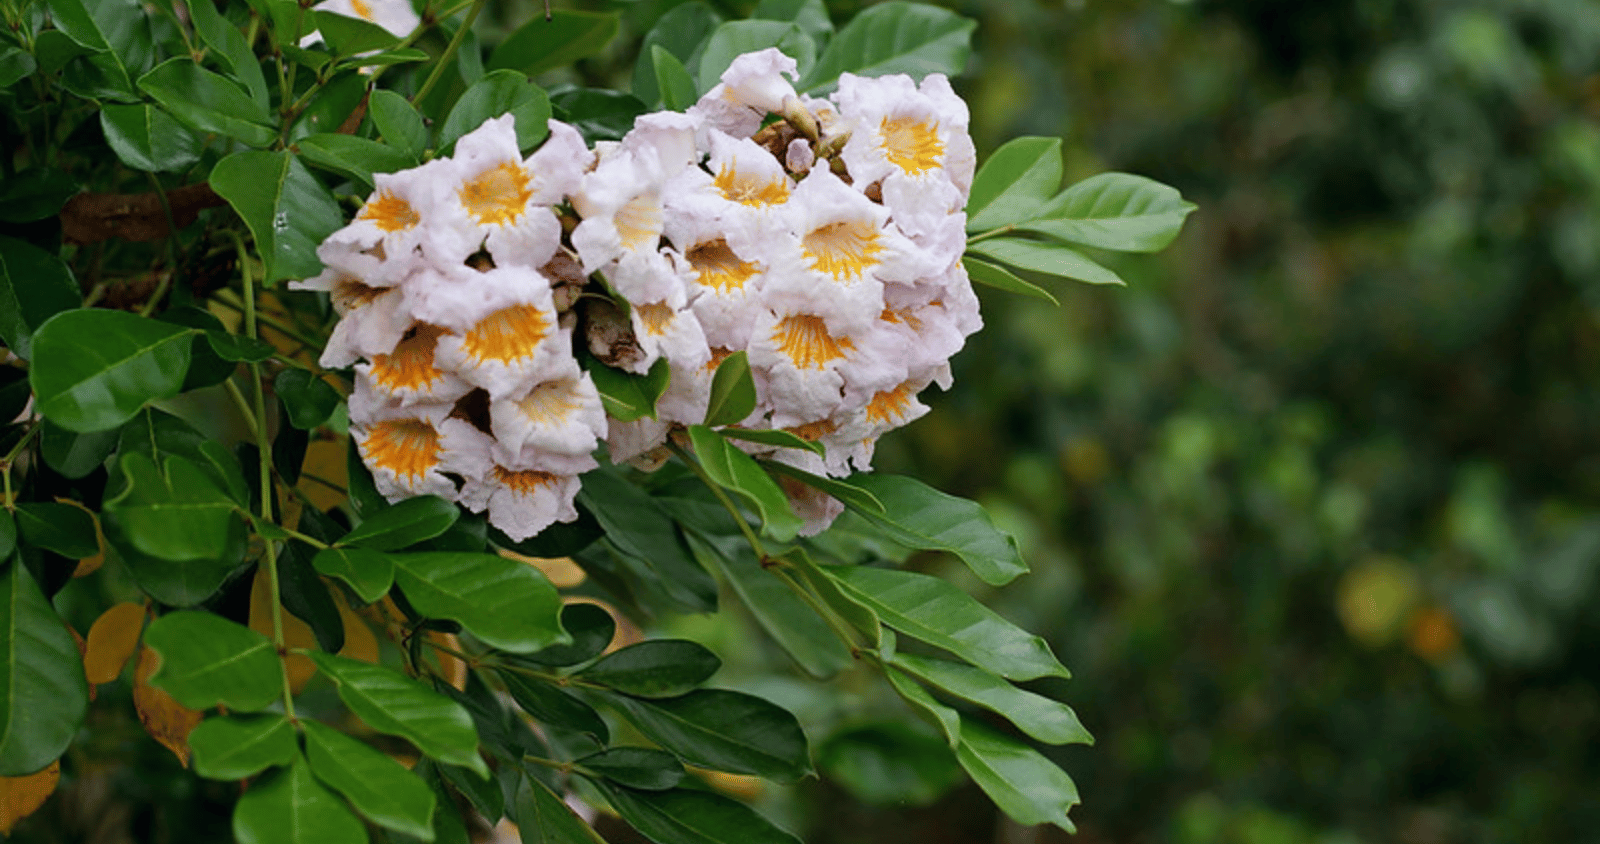
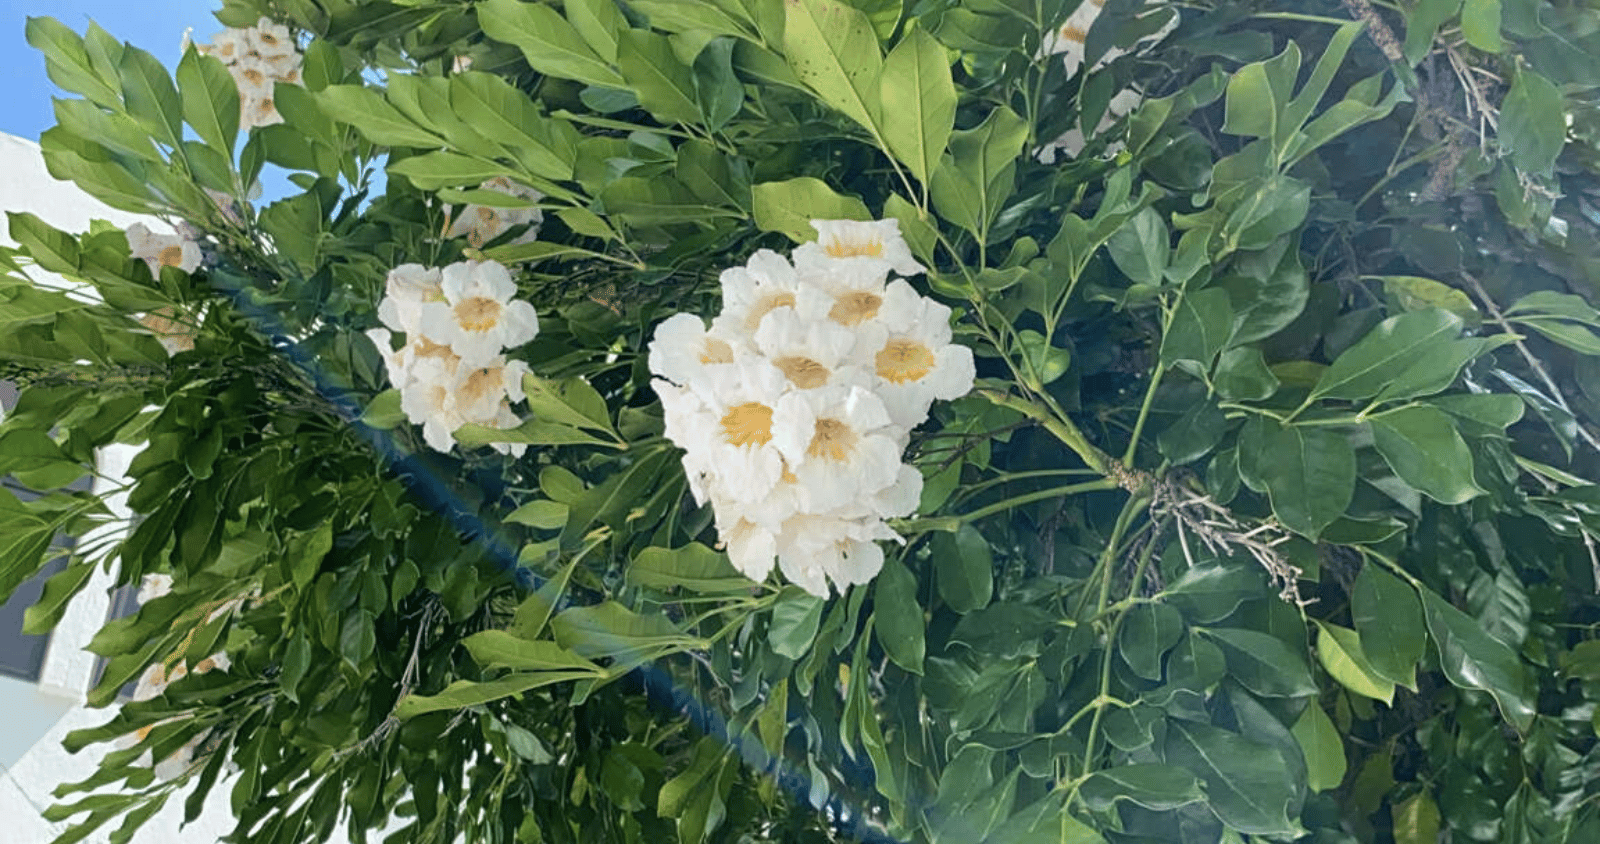
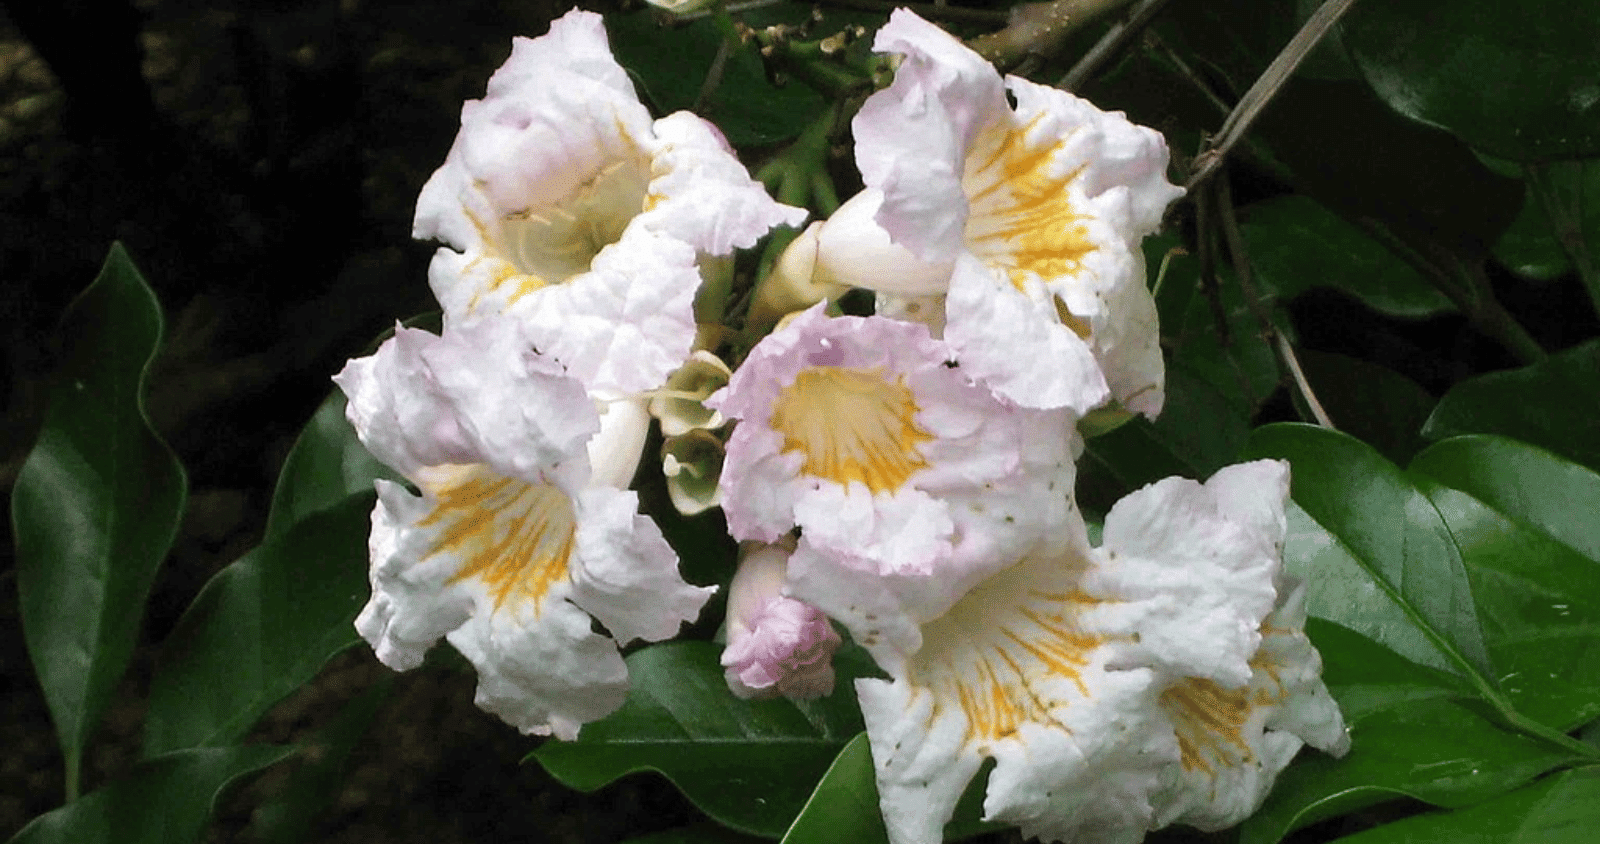
- Fragrant Flowers: One of the most appealing features of Radermachera Summerscent is its fragrant flowers. When in bloom, the plant produces clusters of small, white flowers that emit a delightful scent.
- Attractive Foliage: Like other Radermachera varieties, Summerscent boasts lush, green foliage that adds beauty and vibrancy to any setting. The glossy leaves have a distinctive shape and texture, making the plant visually appealing even when not in bloom.
- Compact Growth Habit: Radermachera Summerscent typically maintains a compact growth habit, making it suitable for small gardens, balconies, or indoor spaces.
- Versatile Use: Whether planted outdoors in a garden bed, displayed in a decorative pot on a patio, or kept indoors as a houseplant, Radermachera Summerscent thrives in various environments.
- Low Maintenance: Like other Radermachera varieties, Summerscent is relatively low maintenance, requiring minimal care to thrive. As long as it receives adequate sunlight, water, and occasional fertilization, it can flourish with ease, making it an excellent option for busy gardeners or those new to plant care.
- Air-Purifying Qualities: Like many indoor plants, Radermachera Summerscent can help improve indoor air quality by filtering out pollutants and toxins. Its presence can contribute to a healthier indoor environment, promoting better respiratory health and overall well-being.
- Aesthetic Appeal: Beyond its practical benefits, Radermachera Summerscent adds aesthetic appeal to any space with its elegant appearance. Whether used as a focal point in a garden bed, a decorative accent on a patio, or a stylish houseplant indoors, its beauty enhances the ambiance of its surroundings.
The post Everything You Need To Know About Radermachera appeared first on Silverstone Gardening.
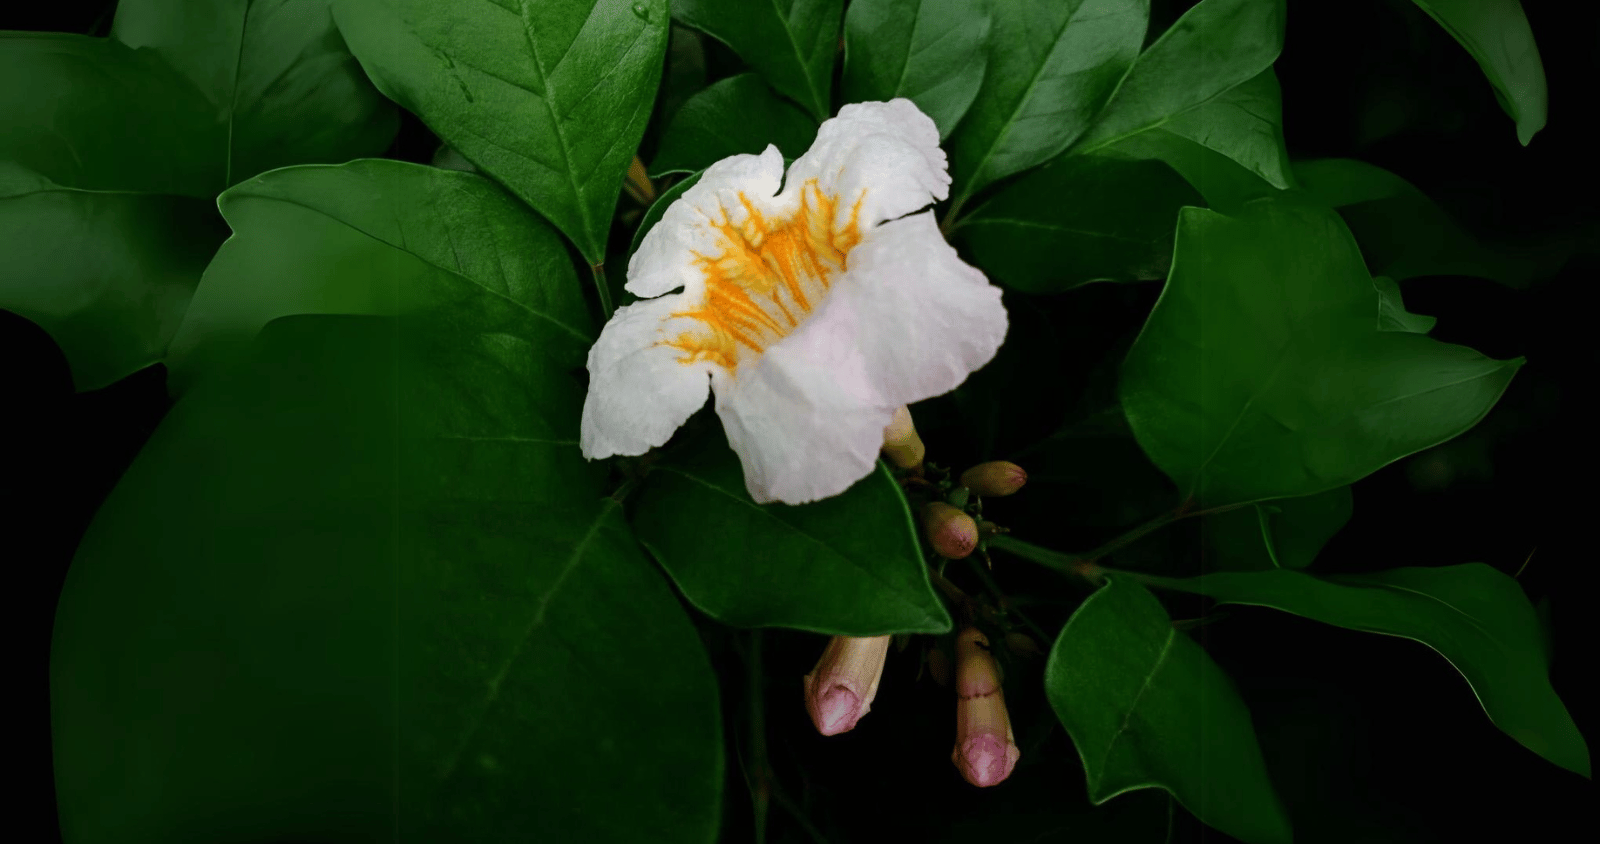
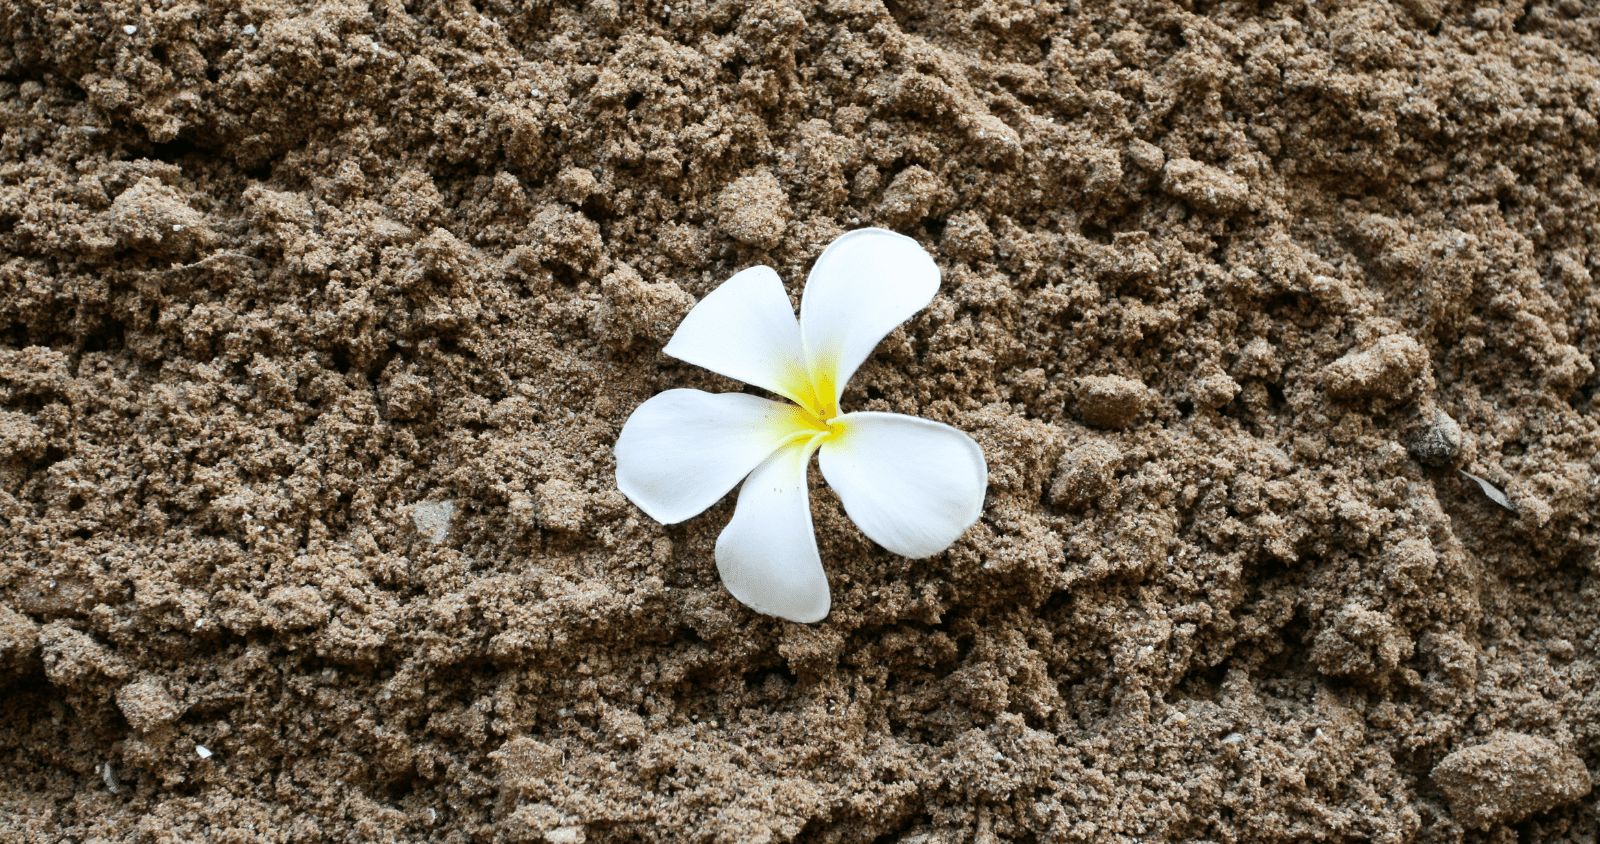
]]>Jasmine, known for its delicate, sweet fragrance and elegant white flowers, is a popular choice for gardens around the world. Not only does jasmine add a beautiful touch to any garden, but its scent also has therapeutic benefits. The fragrance of jasmine is famous for promoting relaxation and reducing stress, making it the perfect addition to create a calming outdoor space. Furthermore, it is a versatile plant that can grow in various climates, making it accessible to gardeners with different environmental conditions. Whether you have a small balcony garden or a spacious backyard, jasmine is sure to enhance the beauty and ambiance of your outdoor oasis. Jasmine is a relatively low-maintenance plant but may benefit from occasional feeding with a balanced fertilizer during the growing season to promote healthy growth and flowering.

Varieties of Jasmine
In Australia, one of the most popular native jasmine species is the Jasminum suavissimum, commonly known as the Australian jasmine. It is a vigorous climber with glossy green leaves and small, fragrant white flowers.
There are over 200 species of jasmine, but some of the most popular varieties include:
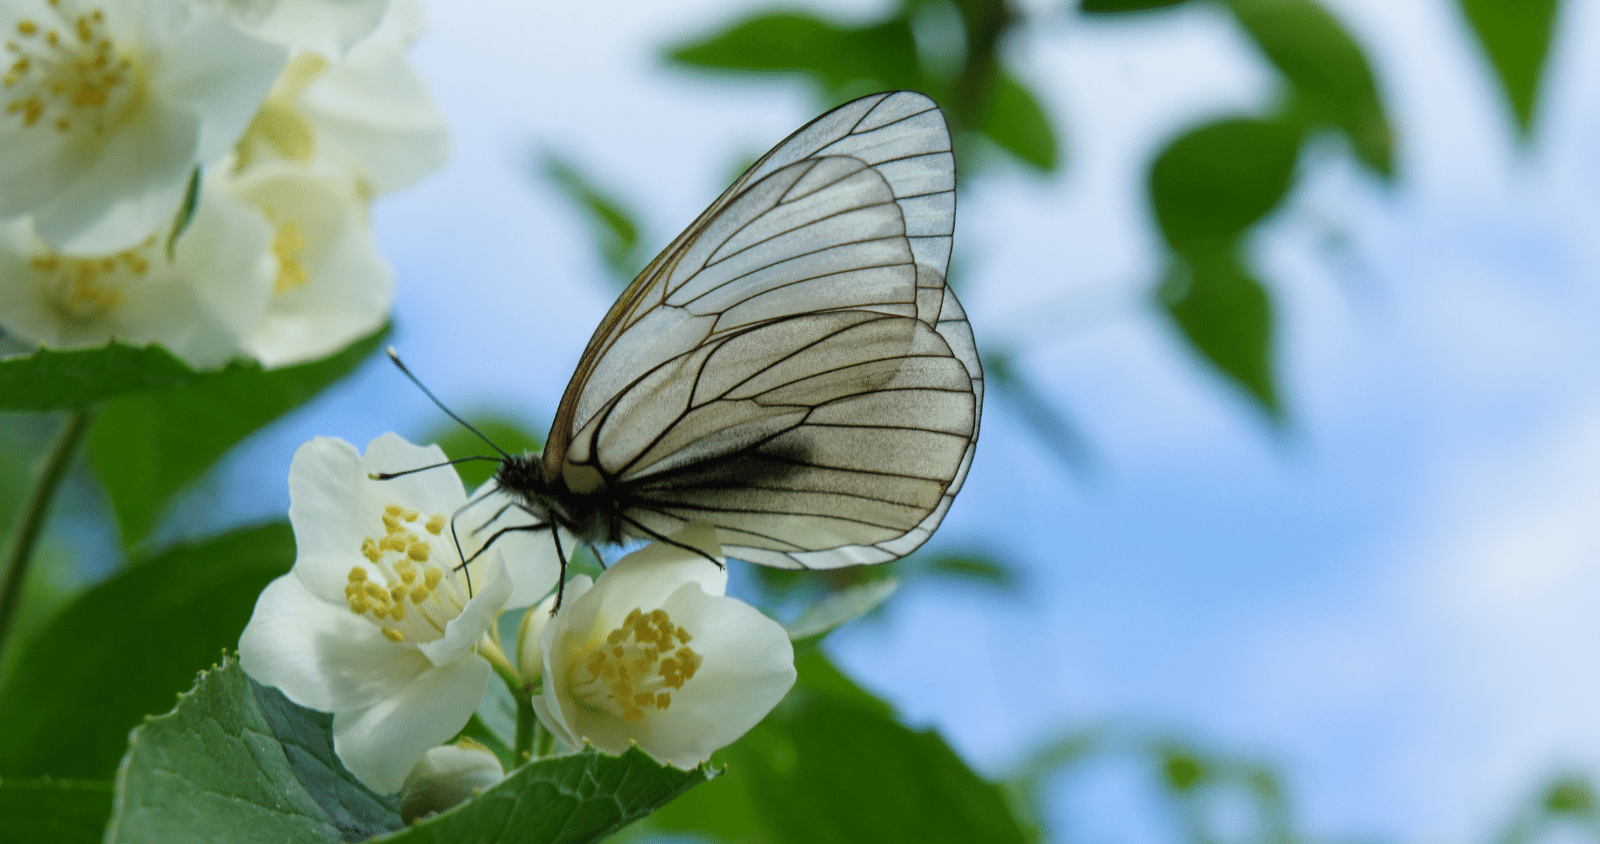
- Jasminum officinale (common jasmine), known for its intoxicating scent and ability to attract butterflies and bees
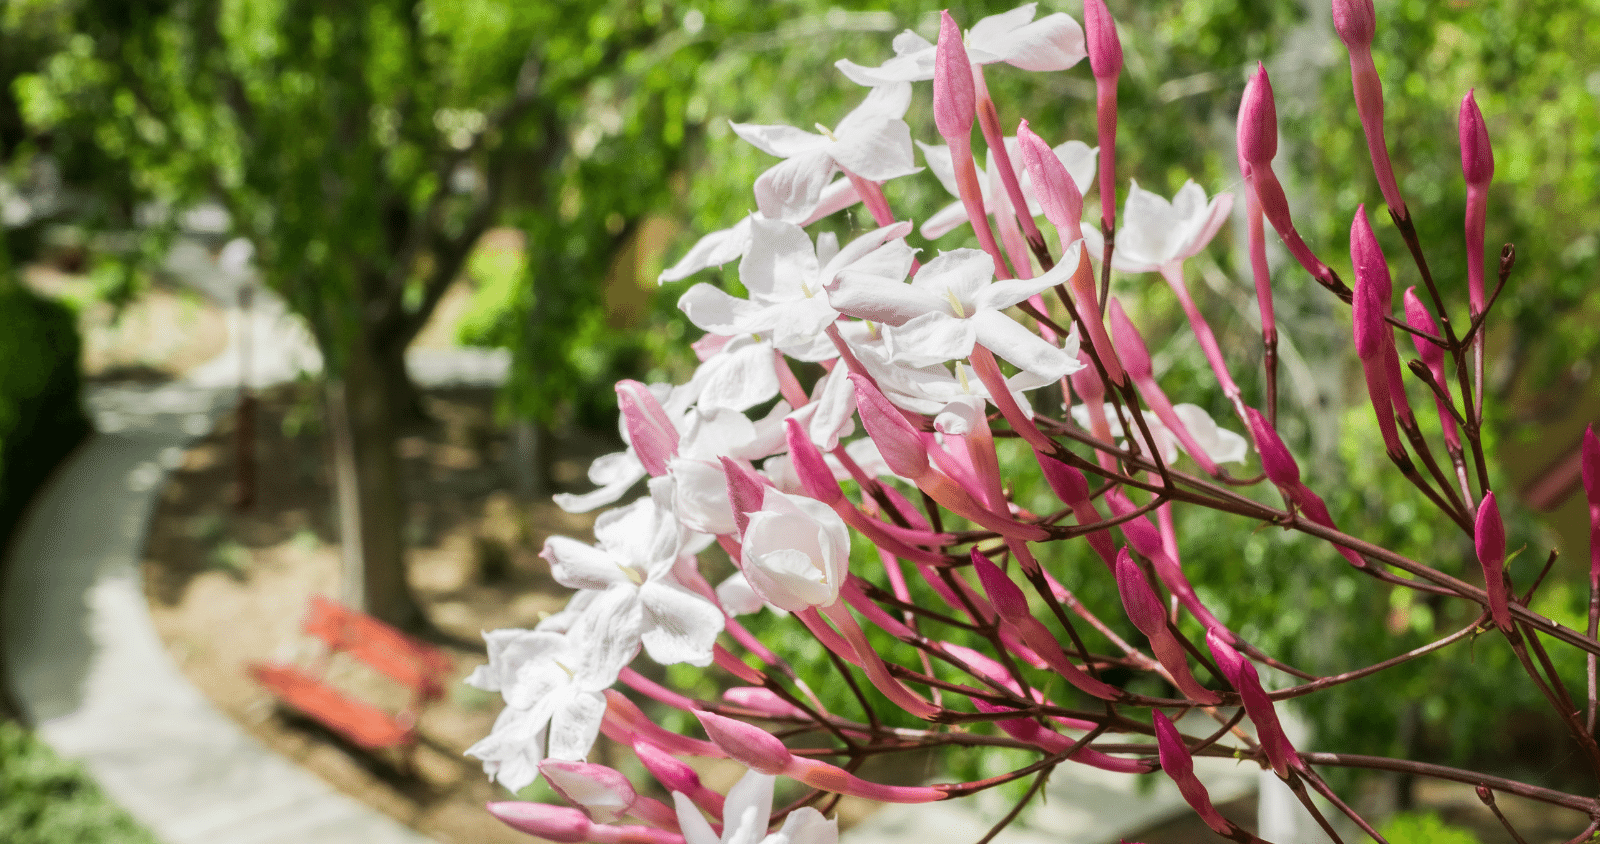
- Jasminum polyanthum (pink jasmine), a fast-growing vine with clusters of pink buds that open to reveal fragrant white flowers. Also known as poet’s jasmine, is a popular choice for gardens and landscapes due to its strong fragrance and delicate white flowers.
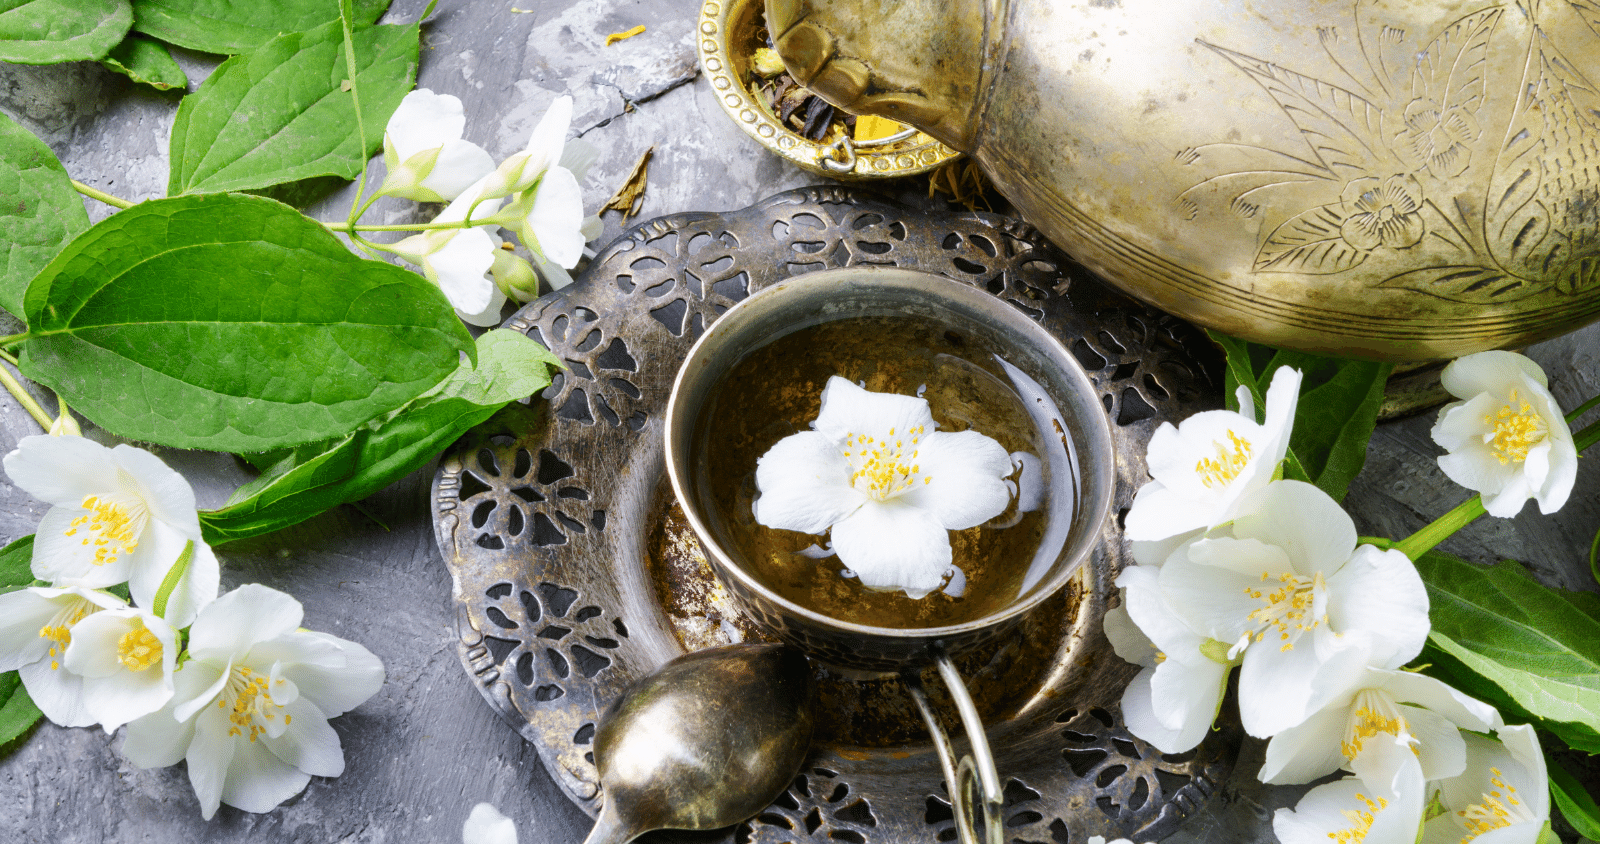
- Jasminum sambac (Arabian jasmine), which is native to Southeast Asia. Its small, waxy flowers are highly fragrant and often used in perfumes and teas.
With such a wide variety of jasmine species to choose from, gardeners can find the perfect addition to their garden to enjoy the sweet scent and stunning beauty of this beloved flower.

Jasmine Varieties with the Best Fragrance
One of the most attractive features of jasmine is its intoxicating fragrance. The flowers of jasmine release their scent most strongly in the evening, making them a popular choice for gardens and outdoor spaces. In Australia, some of the best-smelling jasmine varieties include Jasminum polyanthum (pink jasmine) and Jasminum sambac (Arabian jasmine). These varieties not only have a strong and sweet scent, but they also offer beautiful blooms that add a touch of elegance to any garden.
Jasminum polyanthum, also known as pink jasmine, is a vigorous climber that produces clusters of pink, star-shaped flowers. Its fragrance is highly intoxicating, filling the air with a delightful aroma. On the other hand, Jasminum sambac, or Arabian jasmine, is a shrub-like plant with white, waxy flowers that emit a rich and exotic scent. Gardeners often choose this variety for its versatility, as it can grow as a shrub, climber, or even as a potted plant.
Ideal Growing Conditions
Jasmine thrives in well-draining, slightly acidic soil (to find out what your soil PH is use this kit). It prefers full sun to partial shade and requires a minimum of four to six hours of sunlight each day. This flowering plant is sensitive to extreme weather conditions and prefers mild temperatures. It can tolerate drought once established, but regular watering is recommended, especially during dry periods.
The Best Places to Plant Your Jasmine
This plant thrives in Australia’s climate, preferring full sun to partial shade and well-draining soil. It can grow in pots or containers, making it a versatile plant for gardens, balconies, and patios. This can also grow indoors in Australia, provided it receives adequate sunlight and regular watering.
How much light do jasmine need to thrive?
Jasmine needs at least four to six hours of sunlight each day. Insufficient sunlight can result in leggy growth, reduced flowering, and overall poor plant health. If your flower is not getting enough light, you may notice sparse foliage, weak growth, and a lack of flowering.

How much water do jasmine need per week?
While considered moderately drought tolerant once established, it still requires regular watering, especially during hot, dry periods. On average, it needs about 20-30mm of water per week. However, this can vary depending on the climate and soil conditions.
Do you need to prune jasmine?
Yes, Jasmine respond well to pruining. You should prune regularly to maintain its shape and encourage flowering. It is best to prune it after it has finished flowering, usually in late spring or early summer. You can use sharp pruning shears (if you are looking for some really good shears, here are two great options depending on your budget: option 1 and option 2), a hedge trimmer or seceatuers to prune a jasmine, cutting back any dead or overgrown branches to promote new growth.
How Quickly Will Jasmine Grow?
This plant can grow quickly, especially in the right conditions. They can reach their full height of around 2-3 meters in just a few years. On average, it can grow up to 30-60 centimeters per year, depending on the variety and growing conditions.
You can encourage faster growth with regular water, and fertilisation.

What soil is best for jasmine?
Jasmine plants prefer well-draining soil that is rich in organic matter. It can also tolerate a variety of soil types, including sandy, loamy, and clay soils. However, the addition of organic matter, such as compost or aged manure, can help improve soil structure and fertility, leading to even faster growth. Adding mulch around the base of the plant can also help retain moisture and suppress weed growth, further aiding in the plant’s rapid growth. Regular watering and fertilizing can also promote healthy growth and vibrant blooms.
- If your soil is too sandy, you can improve it by adding compost or well-rotted manure to increase its water retention and nutrient content. If you just need a small amount of compost, this is a great option; if you need a larger quantity, the best option is to contact your local soil supplier.
- If your soil has too much clay, you can improve it by adding organic matter, such as compost, to improve drainage and aeration.
Do you need to fertilise jasmine?
If you have a healthy soil rich in organic matter then you will most likely not need any additional fertiliser, unless your goal is to promote faster growth.
However, if you have poor-quality, sandy soils, then it will be beneficial to fertilise regularly, as this will promote healthy growth and flowering.
Use a balanced fertiliser for jasmine. Here is a great balanced organic fertiliser that can be used on just about every plant. Apply fertiliser in early spring before new growth appears and again in midsummer to encourage flowering. Follow the product label to avoid over-fertilising, as this can lead to excessive foliage growth at the expense of flowers.
Propagating Jasmine
Jasmine is generally considered easy to propagate, especially using the semi-hardwood cutting method. With proper care and attention, cuttings can quickly develop roots and grow into healthy plants. You can propagate this flowering plant through several methods. The most common method of propagating it is by using semi-hardwood cuttings. This method is simple and effective, producing new plants that are genetically identical to the parent plant.

Using Semi-Hardwood Cuttings
One common method is through stem cuttings or semi-hardwood cuttings. Healthy, mature plants can produce stem cuttings or semi-hardwood cuttings. When taking a 4-6 inch cutting from a healthy, mature plant, ensure that you remove any leaves from the bottom half of the cutting. After dipping the cut end in rooting hormone, plant it in a well-draining potting mix. We recommend using this rooting hormone to help root formation in your cuttings. Remember to keep the cutting moist and in a warm, sunny location until roots develop.
Layering
Another method of propagation is through layering, where a low-growing branch is bent down and buried in soil, allowing it to develop roots. Once roots have formed, the new plant can be separated from the parent plant and potted up. Layering allows the new plant to establish a strong root system while still receiving nutrients from the parent plant. It is important to keep the soil around the layered branch consistently moist to encourage root development. After a few weeks, when the new plant has developed a healthy root system, it can be carefully separated from the parent plant and transplanted into its own pot.
Pollination of Jasmine
Jasmine plants rely on pollination by bees, butterflies, moths, and other insects. These pollinators transfer pollen between flowers, leading to fertilisation and seed production. Once pollinated, its flowers develop into small fruits known as berries, containing seeds dispersed by birds, animals, wind, or cultivation by cuttings. Pollination and dispersal are crucial for the reproduction and propagation of jasmine plants, ensuring their presence and diversity in nature.
Common Pests and Diseases
Regularly inspecting the plants for any signs of infestation or disease is crucial in preventing their spread. In the event of an infestation, using organic insecticides or soapy water can help control the pests. Additionally, providing proper air circulation and avoiding overwatering can help prevent the occurrence of fungal diseases. By being vigilant and taking necessary precautions, layered plants can thrive and grow into healthy individuals.
Pests
Common pests that can affect jasmine include aphids, spider mites, and whiteflies. These pests can cause damage to the leaves and flowers of the plant, leading to stunted growth and decreased flowering. To control these pests, it is important to regularly inspect the plant for any signs of infestation and take immediate action. This can include spraying the plant with an organic insecticide or using natural predators, such as ladybugs, to control the pest population. Additionally, proper care and maintenance, such as regular pruning and providing adequate sunlight and water, can help prevent pest infestations.
Diseases
While jasmine plants are generally resilient and resistant to diseases, they can still be susceptible to certain fungal and bacterial infections. Common diseases that can affect this plant include powdery mildew, leaf spot, and root rot. These diseases can cause discoloration, wilting, and decay of the plant. To prevent and control these diseases, it is important to maintain good hygiene practices, such as removing any fallen leaves or debris from the plant’s surroundings and avoiding overwatering. Additionally, applying a fungicide (here is an organic fungicide that will help with powdery mildew and black spot) or using natural remedies, such as neem oil (here is where you can find some neem oil), can help control and prevent the spread of diseases. These pests can be treated with insecticidal soap or neem oil.

Common Mistakes
Jasmine plants can face challenges that lead to issues such as dying or a lack of flowers. Common reasons include improper watering, poor soil conditions, lack of sunlight, nutrient deficiencies, and pests or diseases. To address these issues, ensure your jasmine is watered properly, has well-draining soil enriched with organic matter, receives adequate sunlight, is fertilised regularly, and is checked for pests and diseases.
The three most common mistakes gardeners make with jasmine are:
- Overwatering: Jasmine prefers slightly moist soil, not waterlogged conditions.
- Insufficient sunlight: Jasmine needs adequate sunlight to thrive and flower.
- Neglecting pruning: Regular pruning is essential to maintain the health and shape of jasmine plants.
By providing jasmine with the right growing conditions, including sunlight, water, and soil, you can enjoy the beauty and fragrance of this lovely plant in your garden.
Encouraging Blooming
Pruning after flowering can also help maintain its shape and encourage new growth and blooming. To encourage blooming, provide the right conditions such as proper pruning, fertilization, sunlight exposure, and watering.
Promoting Thicker Growth
For thicker growth, prune regularly to promote branching, fertilize to provide essential nutrients, ensure adequate watering, provide sufficient sunlight, and offer support if growing as a climber. By addressing these factors, you can help your plant thrive and bloom beautifully.

Symbolism of Jasmine
Jasmine is often associated with love, beauty, and purity. Its delicate white flowers and sweet fragrance symbolize purity of heart, love, and sensuality in some cultures. In others, jasmine symbolizes grace, elegance, and positivity.
Jasmine in Mythology
In Hindu mythology, jasmine is associated with the god Vishnu, who is often depicted adorned with jasmine garlands. Jasmine is considered sacred to Vishnu and is used in religious ceremonies and rituals.
Gift of God
Jasmine is also considered a gift from the gods in many cultures. Its beauty and intoxicating scent are often seen as a divine offering, bringing joy and happiness to those who encounter it. In Greek mythology, it is believed that the god Apollo created the jasmine flower as a symbol of beauty and elegance. In ancient China, jasmine was seen as a symbol of good luck and prosperity, and it was often given as a gift to bring blessings and fortune to loved ones. The significance of jasmine in various mythologies and cultures highlights its universal appeal and the deep-rooted symbolism it holds.
Benefits and Uses
In addition to its beauty and fragrance, jasmine is also believed to have several medicinal properties. It is used in aromatherapy for its calming and relaxing effects and is also used in traditional medicine to treat various ailments. In the garden, jasmine is often used as a natural air freshener and insect repellent.
Jasmine is a beautiful and fragrant addition to any garden in Australia. With its rapid growth, lovely fragrance, and easy propagation, it is a popular choice for both beginner and experienced gardeners alike. By providing your plant with the right growing conditions and care, you can enjoy its beauty and fragrance for years to come.
Why Jasmine Smells Good
Jasmine’s delightful fragrance comes from its flowers, which contain aromatic compounds such as benzyl acetate, linalool, and benzyl alcohol. These compounds give jasmine its sweet, floral scent, which is often described as exotic and intoxicating.
Preference among Men
The appeal of jasmine’s scent is subjective and can vary among individuals. However, jasmine is generally regarded as a pleasant fragrance and is often used in perfumery for its floral and exotic notes. Many people, including men, find the scent of jasmine appealing and captivating.
Non-fragrant Jasmine Varieties
While most jasmine varieties are known for their fragrant flowers, there are some varieties, such as Jasminum nudiflorum (winter jasmine), that are not known for their scent. These varieties are valued for their ornamental qualities, such as their bright yellow flowers and hardy nature, rather than their fragrance.
The post Everything You Need To Know About Jasmine appeared first on Silverstone Gardening.
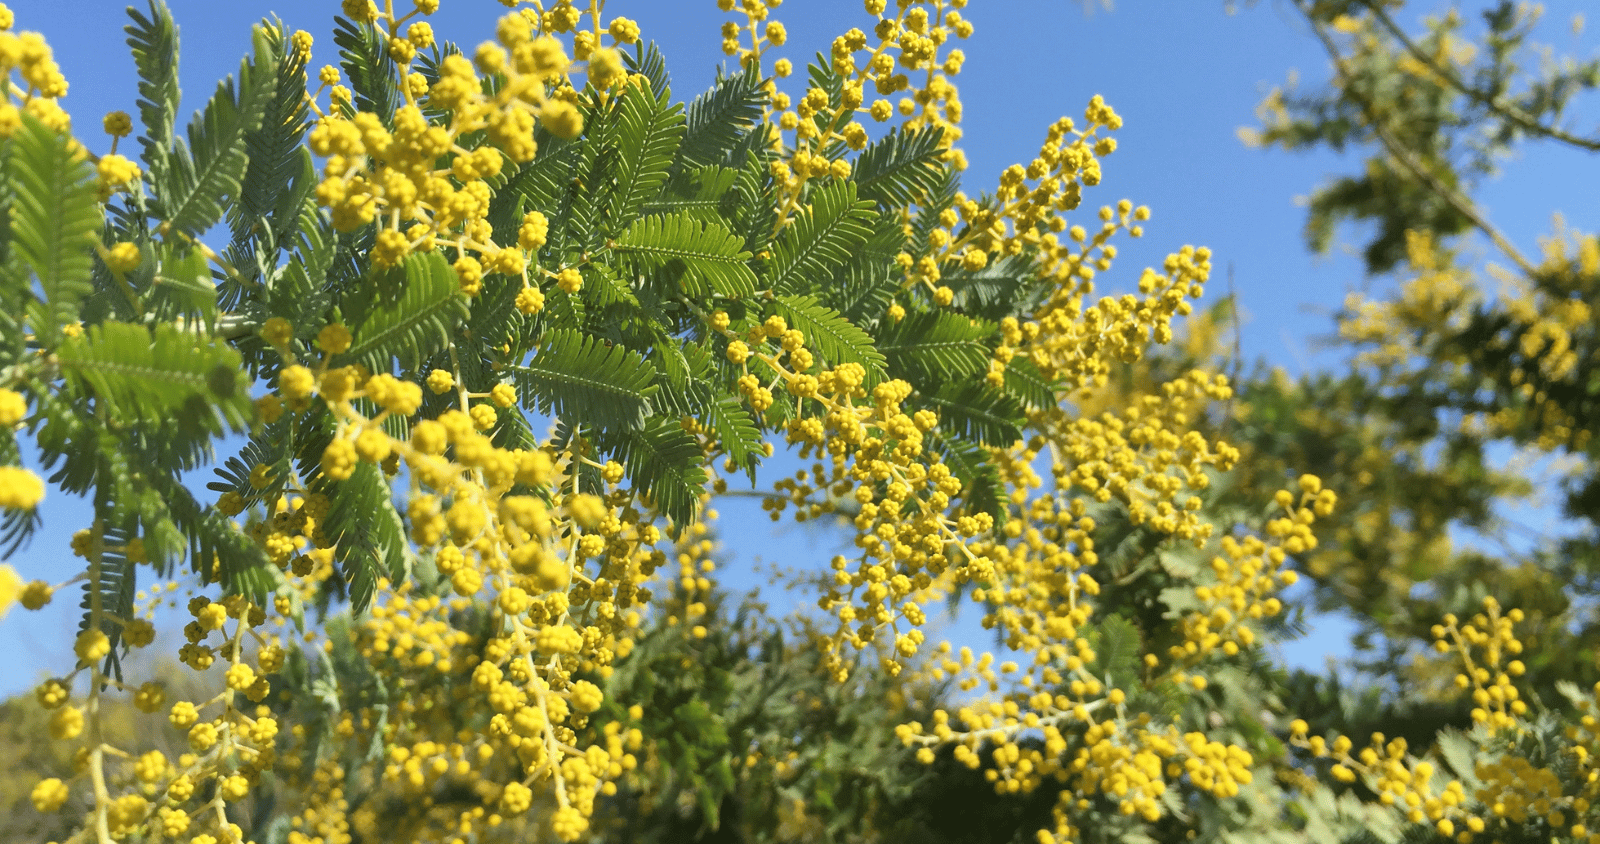
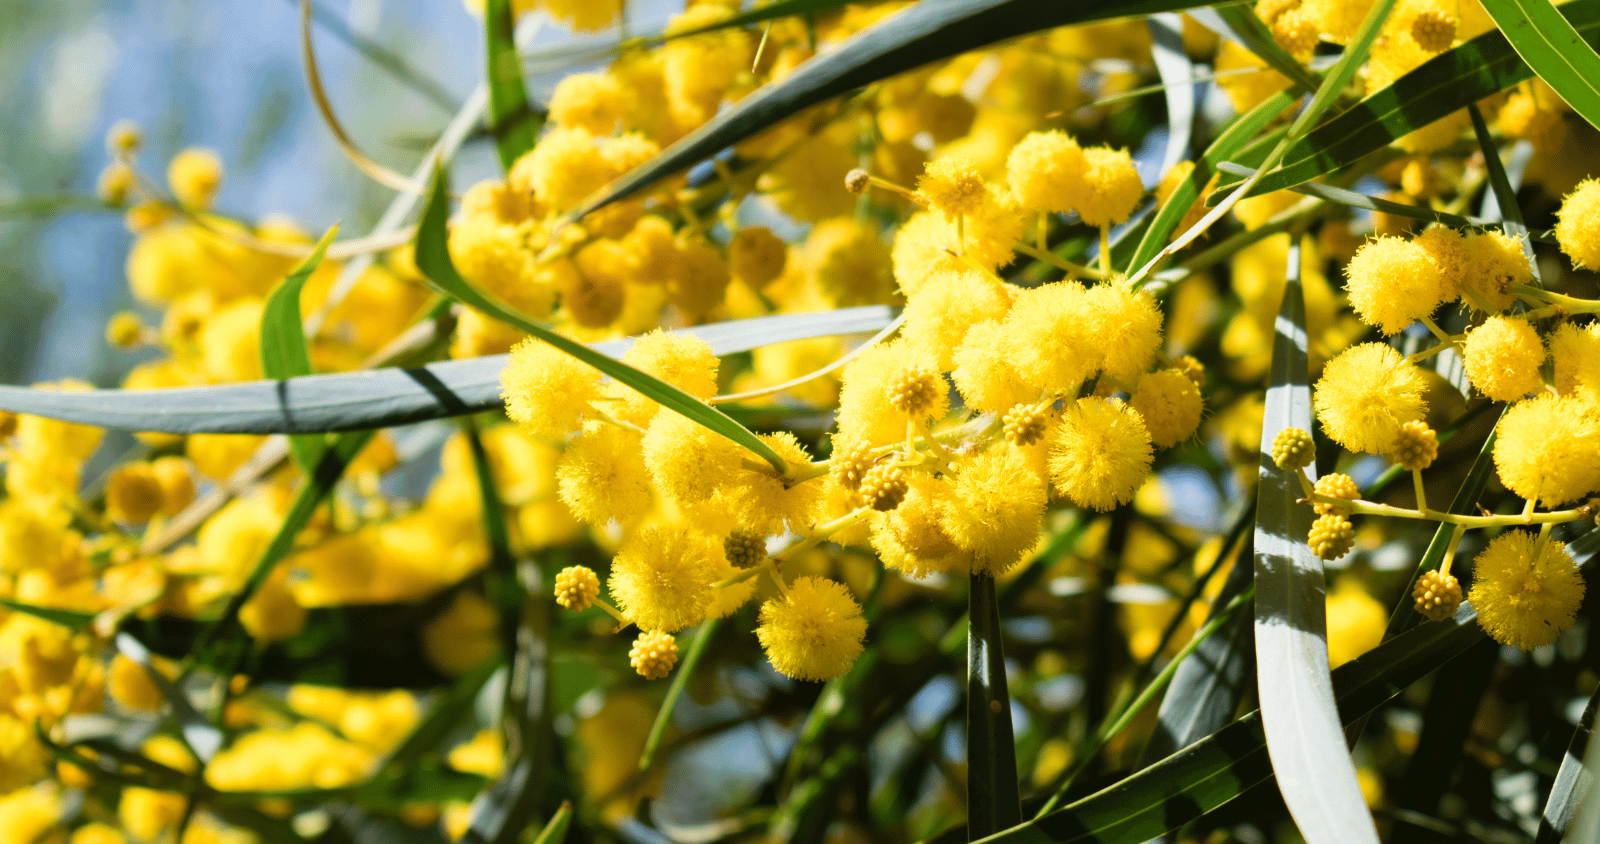
]]>Wattle, scientifically known as Acacia, is an emblematic plant of Australia. The green leaves and golden flowers are actually why Australia uses “Green and Gold” for it’s national sporting colours and not the red, white and blue on the flag.
With over 1,000 species worldwide, it’s no wonder that wattle is a beloved addition to gardens across the globe. From its vibrant yellow flowers to its delicate fern-like leaves, wattle adds a touch of beauty and uniqueness to any landscape. Known for its hardiness and adaptability, wattle thrives in a variety of climates and soil conditions. e.
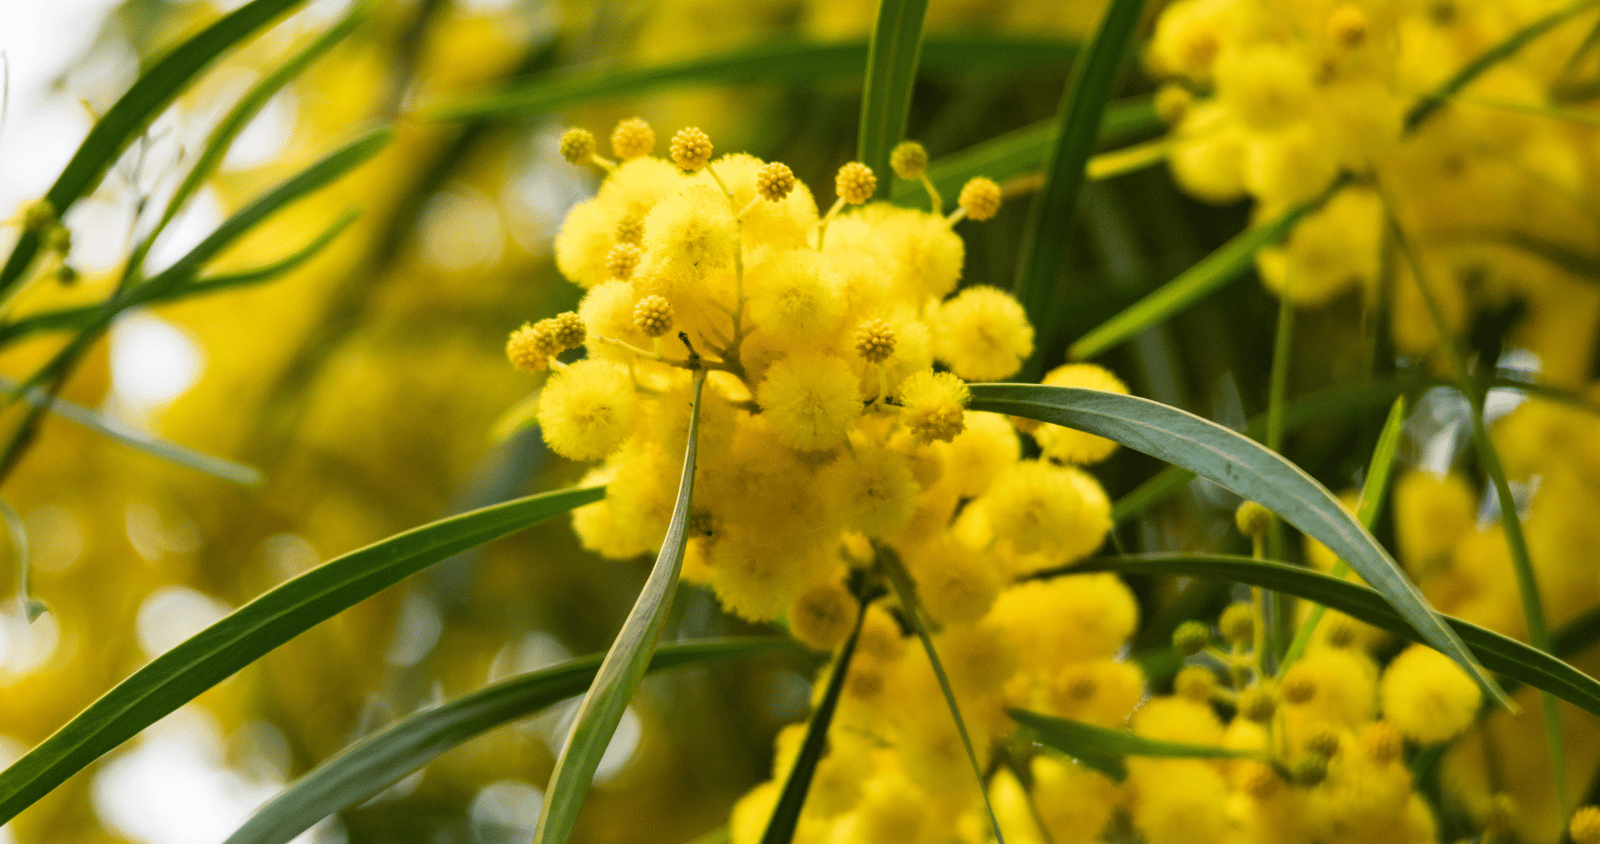
Description and Identification of Wattle
Wattle, belonging to the genus Acacia, is characterized by its distinctive yellow flowers and feathery foliage. The flowers are typically arranged in dense clusters, adding a burst of color to the landscape. The leaves of wattle are usually small and compound, consisting of multiple leaflets attached to a central stem. Depending on the species, wattle can vary in size and shape, from small shrubs to medium-sized trees.

Diverse Array of Wattle (Acacia) Species
In Australia alone, you can find approximately 1,000 species of wattle. Some of the most popular varieties include Acacia pycnantha, Acacia baileyana, and Acacia cognata.
- Acacia pycnantha, or Golden Wattle, is a species popular for its vibrant yellow flowers that bloom in early spring. This variety is a famous choice in landscaping projects and in public parks and gardens throughout Australia.
- Acacia baileyana, or Cootamundra wattle, is another popular species of wattle Native to New South Wales. Known for its beautiful silver-gray foliage and bright yellow flowers, it often serves as an ornamental tree in gardens and along roadsides.
- Acacia cognata, or River Wattle, on the other hand, is a smaller variety of wattle that is commonly used as a decorative shrub in gardens.
What Wattle is Known For
Wattle is notable for its vibrant yellow flowers, which symbolize joy, friendship, and the arrival of spring. The flowers of the wattle tree are a stunning sight, covering the branches in a burst of golden color. These vibrant yellow blooms are not only visually pleasing, but they also hold significant cultural and symbolic meaning in Australia. Its feathery foliage adds texture and depth to garden landscapes. The wattle flower is often synonymous with joy, happiness, and the renewal of life. Its arrival in springtime is a sign of new beginnings and the end of the cold winter months. Additionally, the wattle flower is a symbol of friendship. It is often given as a gift to express love and appreciation for others. Wattle’s adaptability, drought tolerance, and ability to thrive in various environments further contribute to its popularity among gardeners and landscapers.
How Big Do Wattles Grow?
One of the appealing aspects of wattle is its versatility in size and appearance. Because there are so many varieties of Wattle you are likely to find a variety that suits your goals.
While some species of wattle are small shrubs, others can grow into medium-sized trees, reaching heights of several meters. For example, Golden Wattle (Acacia pycnantha) can grow up to 8 meters tall, while Cootamundra Wattle (Acacia baileyana) typically reaches around 5 meters in height. Regardless of size, people love it for its attractive foliage and vibrant flowers, which can range from golden yellow to creamy white, depending on the species. These flowers not only add color to the garden but also attract pollinators such as bees and butterflies, making wattle a valuable addition to any landscape.
How fast do wattles grow?
Wattle can grow relatively quickly, with some species reaching their full height within a few years. On average, wattle can grow around 0.5 to 1 meter per year, depending on the species and growing conditions. However, there are many species of Wattle so it is best to check with the nursery you are buying from to learn more about your specific Wattle.

What are the best growing conditions for Wattles?
Wattle is a resilient plant that thrives in a variety of environments, but it does have some preferences when it comes to soil, sunlight, and weather conditions.
Generally, wattle prefers well-draining soil with good fertility. This means soil that allows water to pass through easily without becoming waterlogged, while still retaining enough moisture for the plant’s roots to access. In terms of sunlight, wattle enjoys full sun to partial shade, requiring at least 6-8 hours of sunlight per day for optimal growth.
However, it can tolerate a range of light conditions, making it adaptable to different garden settings. When it comes to weather, wattle is quite hardy and can withstand drought conditions once established. It can also tolerate moderate frost, making it suitable for a variety of climates.
How much light do wattles need to thrive?
As mentioned earlier, wattle prefers full sun to partial shade and requires at least 6-8 hours of sunlight per day. Inadequate sunlight can lead to poor growth, reduced flowering, and overall weaker plants. To ensure your wattle receives enough sunlight, choose a location in your garden that receives ample sun throughout the day, avoiding areas that are heavily shaded by buildings or trees.
If your wattle is not getting enough light, you may notice symptoms such as sparse foliage, elongated stems, and fewer flowers. In such cases, consider pruning nearby vegetation to allow more sunlight to reach your wattle, or transplant it to a sunnier location if possible.

Are wattles considered drought tollerant?
Yes, Wattle is drought tolerant once established, making it an excellent choice for gardens in regions prone to dry spells. However, it’s essential to provide adequate water, especially during the plant’s establishment phase. Generally, wattle requires around 20mm of water per week during the growing season. This can vary depending on factors such as soil type, weather conditions, and the plant’s stage of growth. To determine if your wattle needs water, check the soil moisture level by inserting your finger into the soil near the base of the plant. If the soil 20-30mm below the surface feels dry to the touch, it’s time to water. Avoid overwatering, as this can lead to root rot and other issues.
How to prune wattle?
The best time to prune wattle is after flowering, typically in late spring or early summer. During this time, you can remove any spent flowers and shape the plant as desired. When pruning, use sharp, clean pruning tools such as hand pruners or loppers to make clean cuts and minimize damage to the plant. If you are looking for some great loppers here are two great options: one avil lopper and one bypass lopper.
Avoid pruning too aggressively, as this can stress the plant and affect its growth and flowering. Instead, aim to remove no more than one-third of the plant’s total growth at a time, focusing on removing dead or diseased branches first. Should you accidentally over-prune your wattle or something similar happens, this product helps the plant become more resilient to stress.
What Soil is Best for wattles?
When it comes to soil preferences, wattle is quite adaptable and can tolerate a wide range of soil types, including sandy, loamy, and clay soils. However, here are some great guides for Wattle to help you get the most out of your plant.
- Wattles thrive in well-draining soil with good fertility. Wattle plants prefer slightly acidic to neutral soil pH levels, ranging from 5.5 to 7.5 (to find out what your soil PH is use this kit). It is important to note that wattle plants do not tolerate waterlogged or poorly drained soil, as this can lead to root rot and other issues.
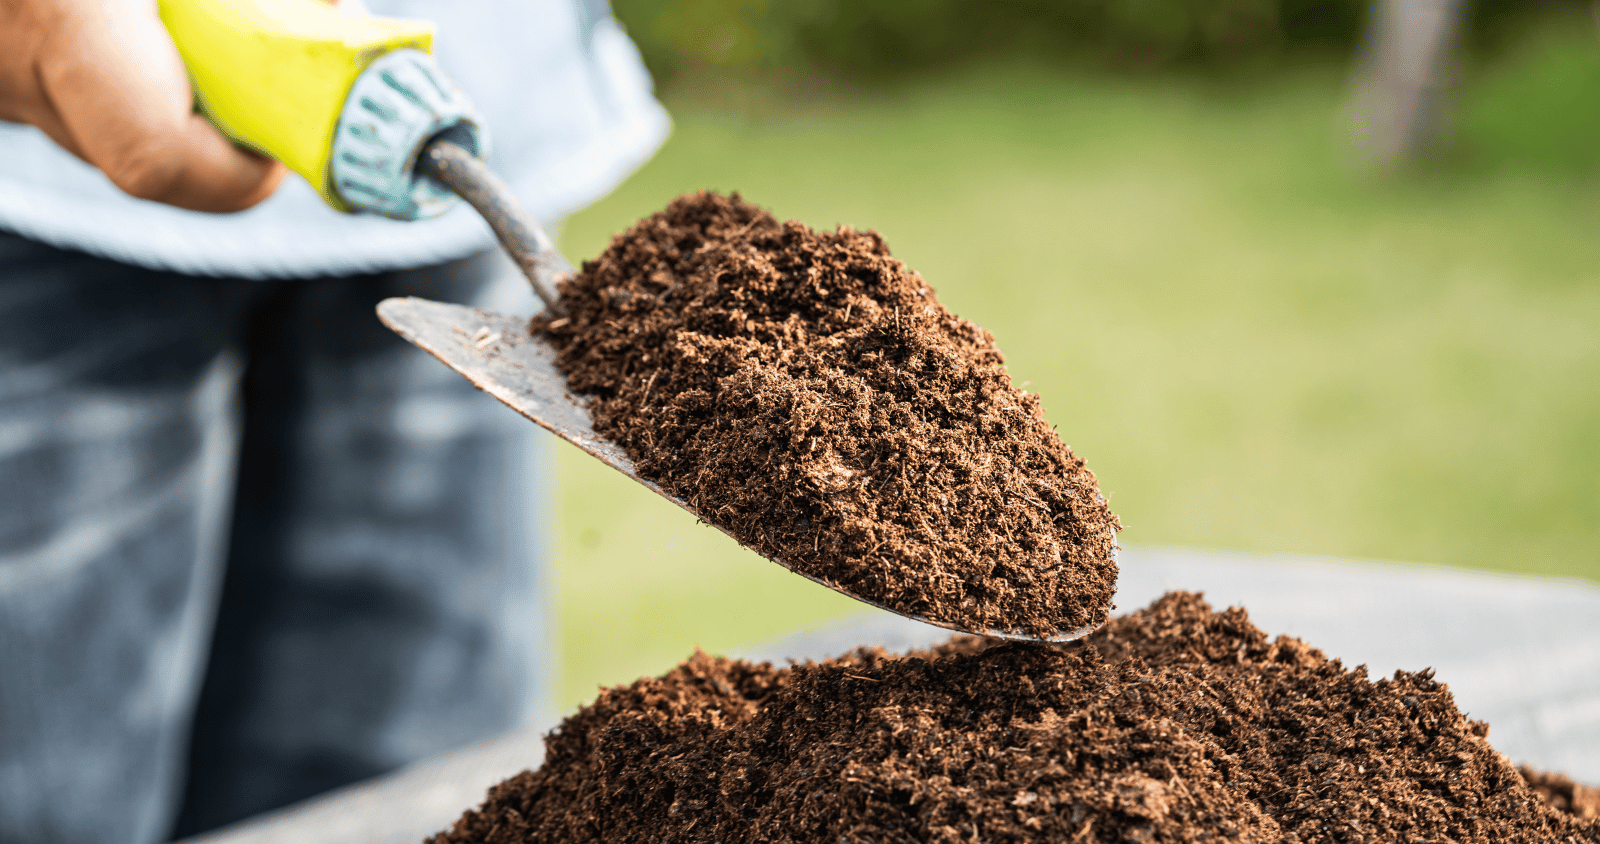
- If your soil is too sandy, incorporate organic matter, such as compost or aged manure, to improve moisture retention and fertility (if you just need a small amount of compost, this is a great option, if you need a larger quantity the best option is to contact your local soil supplier). Adding mulch around the base of the wattle can also help retain moisture and prevent the soil from drying out too quickly.
- For clay soils, adding gypsum or coarse sand can help improve drainage and aeration, creating a more hospitable environment for your wattle to thrive.
To ensure optimal growth, regular watering during dry periods and mulching around the base of the plant can help conserve moisture and suppress weeds. Additionally, applying a balanced fertiliser in early spring can provide the necessary nutrients for healthy growth (here is a great organic fertiliser that can be used on just about every plant). By ensuring the right soil conditions and providing proper care, you can create an ideal environment for your wattle to flourish and showcase its vibrant beauty.
Understanding Fertilisation and Pest Management of Wattle
Do Wattles Need Fertiliser?
Generally the answer is no, most Wattles do not need any additional fertiliser. Wattles can do really well as long as they are grown in suitable soil and are getting enough water and light. However, if your conditons are not optimal or you are trying to promote more growth then you may want to use a fertiliser.
What Fertiliser Is Best For Wattle?
While Wattles generally do not require regular fertilising, applying a balanced fertiliser in the spring can help promote healthy growth, especially if the plant appears to be struggling or showing signs of nutrient deficiencies. Use a slow-release fertilizer formulated for native plants, and follow the manufacturer’s instructions for application rates.
Pest Management
When it comes to pest management, common pests that affect wattle include scale insects, aphids, and borers, Insecticidal soap or horticultural oil can do the trick. Here is where you can find some horticultural oil; make sure to double check that it suits your goals. Diseases such as root rot and fungal infections can occur, especially in poorly drained soil. Ensure proper soil drainage and avoid overwatering to prevent these issues.
Identifying Common Mistakes and How to Avoid Them
Three common mistakes gardeners make with wattle include overwatering, planting in unsuitable soil conditions, and neglecting pruning. By avoiding these common mistakes and providing proper care, you can enjoy a thriving and beautiful wattle in your garden for years to come.
- Overwatering is a common mistake that can lead to root rot and fungal infections in wattle. It is important to monitor soil moisture levels and only water when necessary.
- Planting in unsuitable soil conditions, such as poorly drained soil, can also contribute to these issues. It is crucial to ensure proper soil drainage and choose a well-drained location for wattle.
- Neglecting pruning is another mistake to avoid as it can lead to overcrowding and poor air circulation, which can increase the risk of pest and disease problems. Regular pruning can help maintain the health and shape of the wattle plant.
Wattle and Acacia trees have been the subject of fascination for botanists and nature enthusiasts alike. These flowering trees can thrive in various climates and soil conditions. However, there is still much to discover and explore about these intriguing plants. Researchers are constantly studying their medicinal properties, their role in ecosystems, and their potential for sustainable agriculture. They hold deep historical and symbolic meanings in many societies. As we delve deeper into the world of wattle and Acacia trees, we uncover a wealth of knowledge and appreciation for these remarkable plants.
Exploring the Intriguing Aspects of Wattle and Acacia Trees

Understanding the Significance of the Wattle Tree
The wattle tree holds significant cultural and symbolic value in Australian history and identity. Recognized as Australia’s national floral emblem, representing resilience, unity, and the spirit of the Australian people. Wattle has been used in Indigenous Australian ceremonies for thousands of years. It continues to be a symbol of renewal and hope. In South Africa, wattle trees are recognized for their economic importance. They are a source of timber, fuel, and tannins.
Nitrogen Fixing Plants
An interesting fact about wattle is its ability to fix nitrogen in the soil. This is possible through a special bacteria in its root nodules, making it beneficial for soil health and fertility.
Medicinal uses for Wattle
Some species of Acacia have been used traditionally for medicinal purposes, with various parts of the plant believed to have therapeutic properties. For example, in traditional Aboriginal medicine, the bark of the Acacia pycnantha tree is an ingredient to treat skin conditions and fever. Furthermore, the wood of certain Acacia species is highly valued for its durability and is used in the construction of furniture and tools. Overall, the fascinating characteristics and cultural significance of wattle and Acacia trees make them a valuable and cherished part of our natural world.

Utilization of Acacia Wattle
Acacia wattle has diverse uses, ranging from ornamental landscaping to traditional medicine and food production.
- In Australia, acacia wattle is important for erosion control and land rehabilitation due to its ability to stabilize soil and prevent nutrient loss.
- In addition to its cultural significance, wattle is popular for its timber. It’s a good main material in construction, furniture-making, and crafts due to Acacia wood durability, strength, and resistance to decay, making it a popular choice for furniture, flooring, and outdoor structures. Its hardness and density make it suitable for a wide range of applications, from fine woodworking to heavy-duty construction. They can even withstand harsh environmental conditions, providing long-lasting, and sustainable wood products.
- In ornamental landscaping, acacia wattle is appreciated for its attractive foliage and vibrant yellow flowers. It is often used to add visual interest and create a sense of natural beauty in gardens and parks.
- It’s also an ingredient in traditional medicine for its various healing properties. Its bark, leaves, and seeds are believed to have medicinal benefits, such as relieving coughs, reducing inflammation, and promoting wound healing. The bark of acacia wattle contains tannins that have medicinal properties, making it valuable in traditional medicine practices.
- Furthermore, acacia wattle is a valuable source of food production, particularly in areas with limited agricultural resources. Its seeds and gum are edible. It’s an ingredient in various dishes, providing a sustainable food source for local communities. The seeds of certain acacia species are edible and can be ground into flour or used as a coffee substitute. Thus, it provides a sustainable food source in certain regions.
The post Everything You Need To Know About Wattle (Acacia) appeared first on Silverstone Gardening.
]]>Peperomia plants are a treasure trove of diversity, boasting over 1,000 known species within their genus. Hailing from the Piperaceae family, these plants originate from the lush tropical and subtropical regions of Central and South America. Their popularity transcends borders, captivating gardening enthusiasts globally with their striking foliage and fuss-free care requirements.

Exploring the Rich Variety of Peperomia
When it comes to peperomia, variety is the spice of life. From the compact and charming Peperomia obtusifolia to the intricately patterned Peperomia caperata and the delightful trailing Peperomia prostrata (also known as String of Turtles), there’s a Peperomia to suit every taste and space. In Australia, where gardening is a cherished pastime, favorites like Peperomia obtusifolia, Peperomia caperata, and Peperomia clusiifolia adorn many indoor and outdoor spaces, bringing a touch of the exotic into everyday life.
- Peperomia caperata, also known as the “emerald ripple.” This plant features deep green leaves with ruffled edges, resembling the texture of crumpled paper. Another variety of this is the “red emerald ripple” with hints of red to purple on its dark green leaves and stems.
- Peperomia obtusifolia, also known as the “baby rubber plant,” which has thick, glossy leaves that are a vibrant shade of green. This plant is incredibly low-maintenance and can withstand periods of neglect.
- Peperomia clusiifolia, commonly referred to as the “red edge peperomia,” is another popular variety. It features striking, dark green leaves with a red edge, giving it a unique and eye-catching appearance. This plant is known for its ability to thrive in humid environments, making it a great choice for bathrooms or kitchens.
- Another popular species is Peperomia argyreia, or “watermelon peperomia,” which gets its name from the unique silver and green striped pattern on its leaves that resembles a watermelon rind.

What is the best soil for Peperomia?
Creating an optimal environment for your peperomia will make your work a lot easier going forward.
A high quality potting mix is typically the best option for peperomia, especially when grown indoors. This is because the goal is a well-draining soil mix to avoid root rot and a soil mix that is high in organic content to provide nutrients. A high quality potting mix will tick both of these boxes.
If your soil is too sandy, enrich it with organic matter, such as compost or peat moss, to improve water retention. Conversely, if your soil leans towards clayey, introduce perlite or coarse sand to enhance drainage and aeration, creating an environment conducive to healthy root development.
Characteristics of Ideal Soil for Peperomia:
- Well-Draining: Peperomias are susceptible to root rot if their roots sit in waterlogged soil for prolonged periods. Therefore, it’s essential to use a soil mix that promotes good drainage to prevent water from accumulating around the roots.
- Moisture Retentive: While Peperomias prefer well-draining soil, they also require a soil mix that retains moisture to keep their roots hydrated. A balance between drainage and moisture retention is key to ensuring the plant’s health.
- Lightweight and Loose: Peperomia roots benefit from a loose, aerated soil mix that allows for proper air circulation and root development. Heavy or compacted soils can impede root growth and lead to poor plant health.
- Slightly Acidic: Peperomias thrive in slightly acidic soil conditions with a pH range of 6.0 to 6.5. A pH within this range provides an optimal environment for nutrient uptake and overall plant growth (to find out what your soil PH is use this kit).
How To Make Your Own Soil Mix for Peperomia
Peperomias thrive in a well-draining soil mix that retains moisture while preventing waterlogging. A combination of peat moss, perlite, and coarse sand provides an optimal environment for Peperomias. This ensures adequate drainage, moisture retention, and a slightly acidic pH.
- Peat Moss: Peat moss is an excellent component for retaining moisture in the soil while also providing a slightly acidic pH. Aim to incorporate peat moss into the soil mix to enhance moisture retention without compromising drainage.
- Perlite: Perlite is a lightweight, volcanic mineral that helps improve soil drainage and aeration. Adding perlite to the soil mix promotes root health by preventing waterlogging and compaction. Not sure where to get perlite? Here is where you can get perlite from.
- Coarse Sand: Coarse sand aids in soil drainage and prevents the soil from becoming too compacted. It also contributes to the overall structure of the soil mix, ensuring optimal root development and air circulation.
How much light do Peperomias need?
The amount of sunlight your peperomia needs depends on its specific variety and environmental factors. As a general rule of thumb, aim to provide your plant with about 6-8 hours of indirect sunlight per day. Observing your peperomia’s leaves can provide valuable insights into its light requirements. If you notice leggy growth, pale leaves, or a lack of vibrancy in leaf coloration, it may be a sign that your plant is not receiving adequate light.
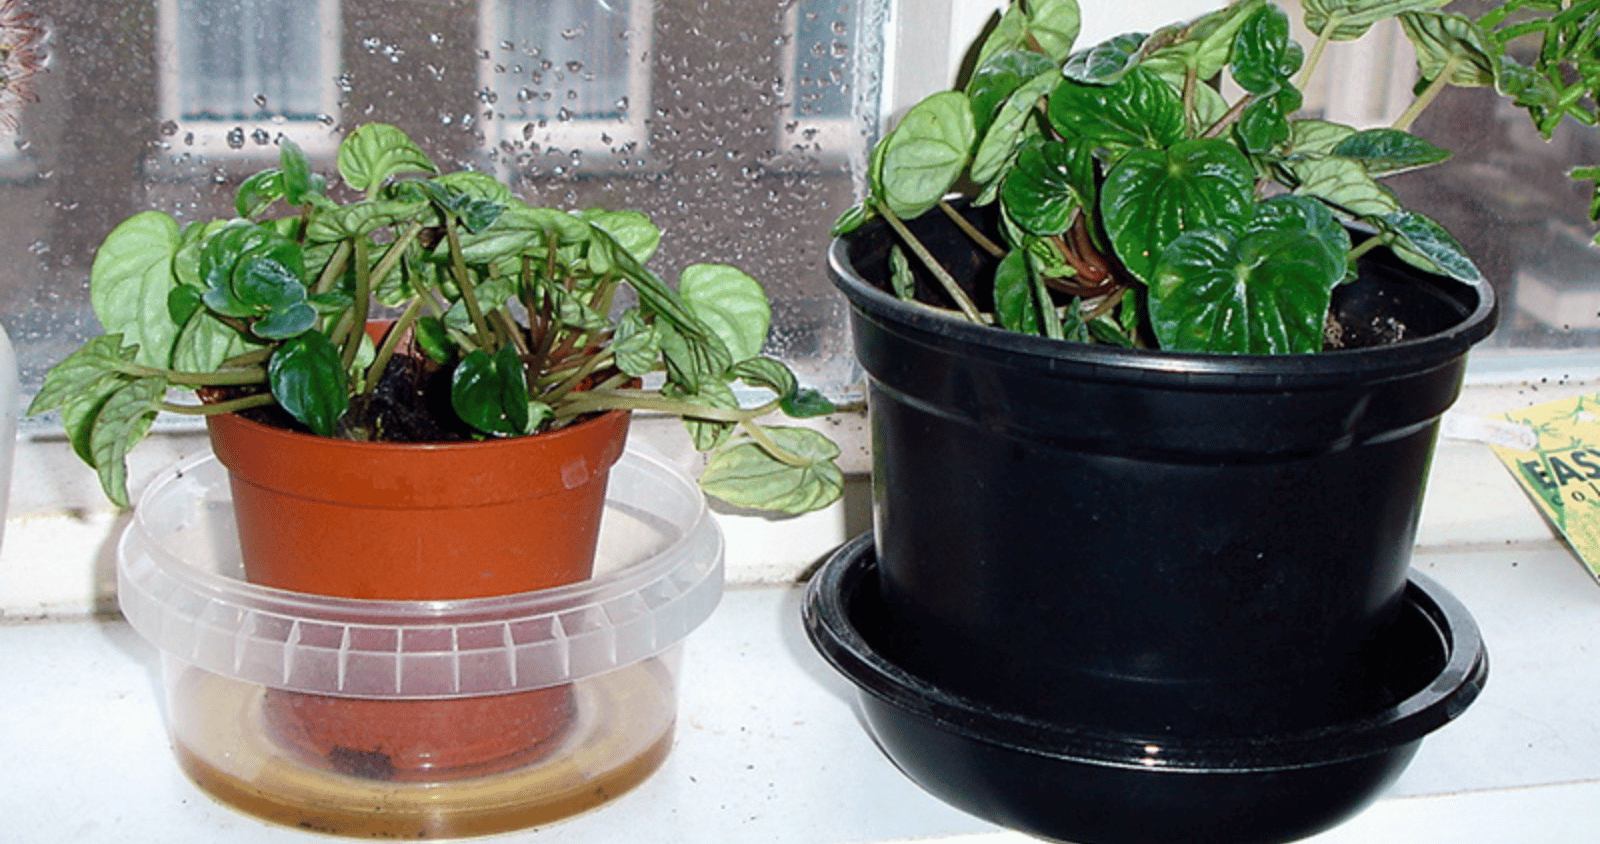
Do Peperomias grow well indoors?
Yes. Peperomias thrive in bright, indirect light, making them ideal candidates for well-lit indoor spot or a lower light part of your garden. Just remember to shield them from direct sunlight, which can scorch their delicate leaves. While they may hail from warm climates, Peperomias appreciate a stable temperature range. They fare best in environments with temperatures above 15°C.

How much water do Peperomias need?
Peperomia do not need as much water as many other common indoor plants (like Peace Lilly’s), it is often more common for people to overwater than underwater. As a general guideline, one watering per week will suit most conditions. However, the best way to tell when your peperomia needs water is when the top inch of soil feels dry to the touch. Again, avoid overwatering and use free-draining soil, as Peperomias are susceptible to root rot in waterlogged conditions.
Bottom watering, where the plant absorbs water from the drainage holes in its pot, can be an effective method to prevent excess moisture accumulation in the soil. Additionally, peperomias can benefit from occasional misting to increase humidity levels, especially in dry indoor environments. However, it is important to avoid over-misting, as excessive moisture can lead to fungal issues.
Are Peperomias Considered Drought Tolerant?
Whilst peperomia typically need less water than most other indoor plants, they are not plants that will handle tough drought conditions. They do need some regular water, my experience is that once a week watering will often be enough.
Do Peperomias Need Pruning?
Pruning plays a minimal role in Peperomia care, but occasional trimming can help maintain its shape and vigor. Focus on removing leggy or damaged growth as needed, particularly in the spring or early summer when the plant is actively growing. Equip yourself with pruning shears or sharp scissors for precise and gentle trimming sessions. (If you are looking for some really good shears, here are two great options depending on your budget: option 1 and option 2)
How Fast Do Peperomias Grow?
Patience is a virtue when it comes to peperomia growth. These plants are known for their slow and steady pace, taking several years to reach their full height. On average, expect your peperomia to grow about 5-10 centimeters per year, with growth rates influenced by environmental conditions and care practices.
Some factors that can affect the growth rate of your peperomia include the amount of sunlight it receives, the temperature of its environment, and the frequency and quality of its watering. Peperomias generally prefer bright, indirect light, so placing them near a window with filtered sunlight is ideal. In terms of temperature, they thrive in average room temperatures between 18-24 degrees Celsius. It’s important to avoid exposing them to extreme temperatures or drafts, as this can stunt their growth.
Additionally, regular fertilising can help growth. But, remember that fast growth is not a common trait of this plant.

Further, incorporating organic matter or specific additives like vermiculite can further enhance soil quality. By selecting the right soil mix and making necessary adjustments based on specific variety requirements, gardeners can provide their Peperomias with the ideal growing medium for vibrant and thriving plants.
- Organic Matter: Incorporating organic matter such as compost or well-rotted manure can enrich the soil with essential nutrients and improve its overall structure. However, ensure that the organic matter is well-composed to avoid introducing pathogens or causing nutrient imbalances. (if you just need a small amount of compost, this is a great option, if you need a larger quantity the best option is to contact your local soil supplier.)
- Vermiculite: Vermiculite is another lightweight mineral that can be added to the soil mix to improve moisture retention and nutrient availability. It helps create a balanced soil environment conducive to healthy plant growth.
Fertilisation: Feeding for Flourishing Foliage
While not heavy feeders, Peperomias benefit from occasional fertilization during the growing season to support their lush foliage. Opt for a balanced liquid fertiliser diluted to half strength and apply it every 4-6 weeks to provide essential nutrients for robust growth. (Here is a great balanced organic fertiliser that can be used on just about every plant). Avoid over-fertilizing as it can lead to excessive leaf growth and a weak root system. It is also important to flush the soil occasionally to prevent salt buildup from the fertilisers.
On top of that, using organic fertilizers such as compost or worm castings can be beneficial for Peperomia plants as they provide slow-release nutrients without the risk of chemical burn. Overall, a balanced and mindful approach to fertilization will ensure the health and vitality of your Peperomia’s foliage.

What pests are common with Peperomia?
Despite their resilience, peperomias are not immune to pests and diseases. Common culprits include spider mites, mealybugs, and aphids, which can be addressed through manual removal or the application of insecticidal soap. Overwatering poses a risk of root rot and fungal diseases, emphasizing the importance of proper watering practices and well-draining soil.
What are the most common mistakes people make with Peperomia?
As with any plant, understanding and addressing common mistakes can pave the way for success with Peperomias.
- Overwatering ranks high on the list, leading to root rot and other moisture-related issues. It is crucial to allow the soil to dry out between waterings and only water when the top inch of soil feels dry to the touch.
- Providing inadequate or excessive sunlight can hinder your plant’s growth and vitality. Peperomias thrive in bright, indirect light, so it is important to find a balance and avoid placing them in direct sunlight, which can scorch their leaves.
- Neglecting humidity needs, especially in dry indoor environments, can also impact peperomia’s health and appearance. To meet their humidity requirements, misting the leaves or placing a tray of water near the plant can help create a more favorable environment.
My leaves are falling off my Peperomia. What does this mean?
If you notice leaves falling from your plant, it may be a sign of overwatering, underwatering, or environmental stress. (This product helps the plant become more resilient to stress.)
If the soil is very wet, and you are loosing leaves, then reduce your watering frequency. It may also help to aerate the soil to help the water drain, or if your peperomia is potted temporary move the pot to slightly sunnier position to help dry the soil a bit quicker (avoid full, harsh sun though).
This can lead to root rot and other fungal diseases, so it is important to adjust your watering schedule accordingly. On the other hand, if the soil feels dry and the leaves appear wilted or crispy, your peperomia may be underwatered. In this case, make sure to water your plant thoroughly and consistently. Allow the water to drain out of the bottom of the pot.
If your soil is dry down to the top inch and your leaves are falling off, then simply increase your watering. If you soil is very dry you may need to ad a wetting agent to help the water penetrate into the dry soil.
However, if the soil is moist and you are loosing leaves it may be that your peperomia is not getting enough light. Peperomias prefer bright, indirect light, so if you notice your plant becoming leggy or pale, it may be receiving too little light. Consider moving it to a brighter location or providing supplemental artificial lighting.
Finally, check for any signs of pests, such as mealybugs or spider mites, which can cause damage to the leaves and overall health of the plant. If you notice any pests, treat them promptly with an appropriate insecticide or by wiping the leaves with a damp cloth. By addressing these issues and providing the necessary care, you can ensure that your peperomia remains healthy and vibrant.

How To Propagate Peperomia
Propagating Peperomia plants offers a delightful opportunity to expand your plant collection or share their beauty with others. There are several simple methods you can use to propagate Peperomia:
- Leaf cuttings: Begin by selecting a healthy leaf with a stem attached. Carefully make a clean cut just below a node where the leaf meets the stem. Plant the cutting in moist soil, ensuring the node is buried. Keep the soil consistently moist and provide indirect light to encourage root development.
- Stem cuttings: Choose a healthy stem with several leaves attached. Use a clean, sharp knife or scissors to make a cut just below a node. Remove any lower leaves to expose the nodes. Plant the cutting in moist soil, ensuring it is stable, and maintain moisture levels until roots develop.
- Division: If your plant has multiple stems or offsets, carefully separate them from the main plant, ensuring each division has roots attached. Plant each division in its own pot with fresh soil, water thoroughly, and provide appropriate care.
- Water propagation: Simply place a cutting in a container of water, ensuring the node is submerged. Change the water regularly to prevent stagnation and maintain oxygen levels. Wait for roots to develop before planting the cutting in soil.
To ensure success, use clean, sharp tools for making cuts, and provide consistent moisture and indirect light to encourage root growth (this product is great for encouraging root growth). With patience and proper care, you can enjoy watching your Peperomia propagate and thrive in multiple locations. We recommend using this rooting hormone to help root formation in your cuttings.

Peperomia’s Benefits Beyond Beauty
Aside from their aesthetic appeal, Peperomias offer several benefits to indoor environments. They are known for their air-purifying qualities, helping to remove toxins and improve indoor air quality. It can also purify the air absorbing toxins such as formaldehyde, benzene, and xylene from the air. making it an ideal choice for those looking to improve indoor air quality. Additionally, their low maintenance requirements and adaptability make them excellent choices for beginners or individuals with busy lifestyles.
Cultural and Symbolic Significance
In various cultures, peperomia plants hold symbolic meanings and associations. In Feng Shui practices, peperomias are often considered auspicious plants that bring luck, prosperity, and positive energy into the home. While they are not traditionally known as “money plants” like Pilea peperomioides, peperomias are believed to attract wealth and abundance when placed in certain areas of the home.
The post Everything You Need To Know About Peperomia appeared first on Silverstone Gardening.
]]>Plant Type and Varieties

What type of plant is a bottlebrush?
Bottlebrush belongs to the genus Callistemon and encompasses a diverse range of shrubs and trees originating from Australia. With over 40 species and an array of cultivars, there’s a bottlebrush variety for every garden.
Notable choices include the vibrant Callistemon citrinus (Crimson Bottle Brush), the graceful Callistemon viminalis (Weeping Bottle Brush), and the elegant Callistemon salignus (White Bottle Brush). Some popular cultivars include ‘Little John’, which has compact growth and bright red flowers, and ‘Captain Cook’, which has pink flowers and a more upright habit. These plants are native to Australia but have been cultivated in various parts of the world due to their unique and attractive blooms.
What Colors Are Bottlebrush Plants?
Bottlebrush plants come in a range of colors, with red, pink, and white being the most common. There are also some bottlebrush plants that bloom in shades of purple, orange, and yellow. These vibrant colors add a pop of color to any garden or landscape. The unique shape of the bottlebrush flowers, with their long, cylindrical clusters of stamens, makes them a standout feature in any garden. Whether used as a focal point or as a border plant, bottlebrush plants are sure to attract attention with their striking and diverse colors.

Understanding Growing Conditions
One of the remarkable features of bottlebrush plants is their adaptability to various soil types. Bottlebrush can thrive whether your soil is sandy, loamy, or anything in between. These hardy plants prefer well-draining soil, preventing waterlogged roots that can lead to issues like root rot.
Bottle Brush is also sun-loving, craving full sunlight to showcase its best performance. Plant it in a spot that receives at least 6 to 8 hours of direct sunlight daily. This ensures robust growth, prolific flowering, and an overall healthy appearance.
Size and Aesthetics: Adding Beauty to Your Garden
The size of your bottlebrush plant depends on the species and variety you choose. Generally, they range from 1 to 4 meters in height, but some taller species like Callistemon viminalis (Weeping Bottle Brush) can reach to 8-9 meters. What makes them truly captivating are their distinctive bottlebrush-shaped flowers. Available in an array of colors, including red, pink, and white, these flowers make Bottle Brush a visually appealing addition to any garden.
Meeting Sunlight Requirements
For beginners, understanding the sunlight needs of your bottlebrush plant is crucial. Ensure it receives the recommended 6 to 8 hours of direct sunlight each day. If your plant is not thriving, signs of insufficient light may include reduced flowering, leggy growth, and a generally lackluster appearance. If you notice these signs, consider moving the plant to a sunnier location if possible.

Are Bottlebrush (Callistemon) Drought-Tolerant?
Absolutely! Once established, bottlebrush plants are renowned for their drought tolerance. However, during prolonged dry spells, providing supplemental water is beneficial. This extra care ensures your bottlebrush remains vibrant and continues to produce those striking bottlebrush blooms as during dry spells you can often expect less flowers. If you still want to see considerate amounts of blooms, this product is great for helping with heat stress. This is best applied before the stress but can also help after or during a heat wave
Watering Needs: Keeping Your Bottle Brush Hydrated
While the bottlebrush is resilient, it does appreciate consistent watering. Aim for about 20-30mm of water per week, ensuring the soil remains consistently moist but not waterlogged. Adjust your watering frequency based on local weather conditions and the moisture retention of your soil.
Pruning Guidelines for Healthy Growth
Pruning bottlebrushes is very simple.
Annual prune to keep the plant healthy: The best time for pruning is after the flowering period, usually in late spring or early summer. Using clean, sharp pruning shears, remove spent blooms and shape the plant to encourage bushier growth. If you are looking for some really good shears, here are two great options depending on your budget: option 1 and option 2.
Regular pruning for informal hedges: Light hedge trimming can help keep your bottle brush neat and compact. Small hedges like “Little John” may need pruning every 4-8 weeks, whilst large informal screening hedges will do well with pruning every 10-14 weeks.

Growth, Lifespan, and Propagation
Understanding Growth Rates
It is hard to give exact growth rates as this depends on the variety and the conditions. On average, these plants can grow 0.5 to 1 meter per year, depending on the species and growing conditions. This rapid growth adds to their appeal, making them an excellent choice for gardeners looking to establish a vibrant landscape quickly.
What is the fastest-growing bottlebrush plant?
Among its species, one of the fastest-growing varieties is the Weeping Bottlebrush or Callistemon viminalis. This species can reach full height (6-9m) in just a few years, making it an ideal choice for those looking to quickly establish a natural barrier or create shade. However, its rapid growth can also pose a challenge in terms of maintenance. Regular pruning is necessary to prevent the tree from becoming too large and overwhelming the surrounding landscape. Additionally, the Weeping Bottle Brush may require extra care and attention to maintain its shape and prevent it from encroaching on nearby plants.

Soil Preferences and Improvement: Creating the Ideal Environment
Bottlebrush plants are adaptable, but they do have preferences. They thrive in well-draining, slightly acidic to neutral soil (to find out what your soil PH is use this kit). If your soil is sandy, enrich it with organic matter like compost to enhance water retention. (If you need a small amount of compost, this is a great option, if you need a larger quantity the best option is to contact your local soil supplier.) For clayey soil, improve drainage by incorporating sand and organic amendments.
Fertilisation: Nourishing Your Bottle Brush
While Bottle Brush can tolerate nutrient-poor soils, a bit of fertilisation can go a long way in promoting flowering and overall plant health. Use a balanced, slow-release fertiliser in spring, ensuring it’s low in nitrogen to prevent excessive foliage growth.
Should I feed my bottlebrush plant?
While bottlebrush plants can tolerate nutrient-poor soils, periodic feeding with a balanced, slow-release fertiliser in spring can promote healthier growth and flowering. Fertilising your bottlebrush plant can provide it with the necessary nutrients to thrive and produce vibrant flowers. It is important to choose a balanced, slow-release fertiliser that is low in nitrogen to prevent excessive foliage growth. By incorporating this feeding regimen into your spring gardening routine, you can encourage healthier growth and maximize the blooming potential of your bottlebrush plant.
What is the best fertilizer for bottlebrush trees?
A balanced, slow-release fertilizer with equal N-P-K (nitrogen, phosphorus, and potassium) content is suitable for bottlebrush trees. Avoiding excessive nitrogen is crucial, as it can divert the plant’s energy towards leaf production rather than flower formation, hindering its overall blooming potential. Therefore, a slow-release fertilizer with roughly equal amounts of nitrogen, phosphorus, and potassium is the best choice for bottlebrush trees. Here is a great organic balanced fertiliser that can be used on just about every plant
Common Pests and Diseases: Nipping Problems in the Bud
Bottlebrush plants are relatively hardy, but like any garden inhabitant, they can face challenges. Whilst very rare, some pests like scale insects and aphids may be seen on a bottlebrush. Combat these with insecticidal soap or neem oil (here is where you can find some neem oil). Root rot can occur in waterlogged soil, so proper drainage is crucial. Keep an eye out for rust and fungal leaf spots, treating them promptly with fungicides. (Here is an organic fungicide that will help with fungal leaf spots such as powdery milder and black spots.)
Common Mistakes: Learning from Experience
- Overwatering Woes: Ensure well-draining soil to prevent waterlogged roots and subsequent issues like root rot.
- Pruning Neglect: Regular pruning encourages bushier growth, enhances flowering, and maintains an attractive shape.
- Sunlight Shortage: Providing the recommended hours of direct sunlight ensures your Bottle Brush plant thrives and produces abundant blooms.

Unraveling the Secrets of Bottlebrush (Callistemon)
Common Names and Special Features
What is the lifespan of a bottlebrush tree?
Bottlebrush trees can have a lifespan of 20 to 40 years, depending on the species, growing conditions, and care provided. Factors such as climate, soil quality, and proper watering and fertilization can greatly impact the lifespan of a bottlebrush tree. With optimal conditions and proper care, some bottlebrush trees may live for up to 50 years. However, it’s important to note that as the tree ages, it may become more susceptible to diseases and pests, which can shorten its lifespan. Regular inspections and prompt treatment of any issues can help prolong the life of a bottlebrush tree.

How do you propagate a bottlebrush?
Bottlebrush plants can be propagated through seeds or cuttings. Seeds should be collected from mature capsules and sown in well-draining soil. Alternatively, cuttings can be taken from healthy branches and rooted in a suitable propagation medium. Both methods require patience and proper care to ensure successful propagation.
1. Propagating bottlebrush trees through seeds: This process requires careful harvesting and preparation of the seeds, as well as providing suitable growing conditions for germination. To propagate a bottlebrush tree through seeds, the seeds need to be collected from mature fruits and then soaked in water for 24 hours to loosen the hard seed coat. After that, the seeds can be planted in a well-draining potting mix and kept in a warm, humid environment until they germinate.
2. Cultivating bottlebrush trees from cuttings: Alternatively, bottlebrush trees can also be propagated through cuttings by taking a 6-8 inch long stem cutting from a healthy tree and removing the lower leaves. The cutting can then be dipped in a rooting hormone and planted in a potting mix, keeping it moist until roots develop. This technique involves selecting appropriate branch sections, preparing them for rooting and providing optimal conditions for successful establishment. (We recommend using this rooting hormone to help root formation in your cuttings.)
Maintenance and Common Issues
How do you maintain a bottle brush plant?
Maintenance involves regular watering, proper pruning after flowering, and periodic fertilization. Ensure they receive adequate sunlight and monitor for pests and diseases.
How do you reshape a bottle brush tree?
To reshape a bottlebrush tree, prune selectively after flowering. Remove any dead or crowded branches to encourage a more balanced and attractive shape.
Can I move my bottle brush plant?
While established plants may not appreciate transplanting, younger bottlebrush plants can be moved during their dormant season. Ensure you transplant with care, minimizing root disturbance.
Why is my bottle brush tree dying?
Several factors, such as overwatering, poor drainage, or pest infestations, could contribute to a dying bottlebrush tree. Evaluate environmental conditions, adjust watering practices, and inspect for pests to address the issue.

Leaves and Flowering
Do bottlebrush trees lose their leaves?
Bottlebrush trees are generally evergreen, retaining their leaves throughout the year. However, they may shed some leaves as part of their natural growth cycle.
Why is my bottle brush tree not flowering?
Insufficient sunlight, improper pruning, or nutrient deficiencies may hinder flowering. Ensure your plant receives enough sunlight, prune as recommended, and consider fertilizing with a balanced fertilizer.
How do you make a bottle brush flower?
Adequate sunlight, proper pruning, and occasional fertilization can encourage robust flowering. Ensure your plant is in a sunny location, prune after flowering, and provide a suitable fertilizer to enhance blooming.

Interesting Facts and Benefits
What are some interesting facts about bottle brushes?
Bottlebrushes belong to the family Myrtaceae, which also includes eucalyptus trees. Some indigenous Australian cultures used the nectar from bottlebrush flowers as a sweet beverage. Bottlebrush trees are native to Australia and are known for their unique, brush-like flowers that resemble a bottle brush. These trees are also popular among birds and butterflies, as they provide a good source of nectar. Additionally, bottlebrush trees are known for their ability to attract beneficial insects, such as bees and hummingbirds, which can help with pollination in the garden.
What are the benefits of the Callistemon tree?
Callistemon trees offer not only aesthetic appeal but also attract pollinators like bees and birds. Their hardiness and adaptability make them low-maintenance additions to gardens. Furthermore, bottlebrush trees have the ability to thrive in various soil types and tolerate drought conditions, making them suitable for different climates. The dense foliage of these trees also provides shade, reducing the temperature and creating a more comfortable environment in the garden. Moreover, Callistemon trees have been used in traditional medicine for their antimicrobial and anti-inflammatory properties.
Is the bottlebrush plant anti-mosquito?
While not a guaranteed deterrent, some gardeners believe that the aromatic foliage of bottlebrush plants may help repel mosquitoes. However, it is important to note that we should not solely rely on it, as it is not a guaranteed deterrent for mosquitoes. Implementing proper mosquito control methods, such as removing standing water and using mosquito repellents, is essential for effective mosquito prevention.
What are the disadvantages of bottlebrush tree?
While bottlebrush trees are generally hardy, some disadvantages include their potential for becoming invasive in certain regions. Their rapid growth can lead to overcrowding, and some species may be sensitive to frost. Additionally, the bottlebrush tree’s dense foliage can create a lot of shade, which may hinder the growth of other plants in the vicinity. Furthermore, the tree’s flowers, although visually appealing, can produce a large amount of debris when they fall, requiring regular clean-up. Lastly, the bottlebrush tree’s shallow root system can make it susceptible to wind damage and instability during severe weather conditions.
The post Everything You Need To Know About Bottlebrush appeared first on Silverstone Gardening.
]]>Jacaranda is a genus of flowering plants in the family Bignoniaceae, known for its stunning purple-blue flowers. Another name for the Jacaranda tree is “blue trumpet tree,” referring to the shape of its flowers and seed pods. The most common species grown for ornamental purposes is Jacaranda mimosifolia, prized for its fern-like leaves and trumpet-shaped blooms. Jacaranda trees are particularly popular in Australia, where most locals admire them for their vibrant display of flowers.

Varieties and Cultivars
There are many varieties and cultivars of Jacaranda trees available, each with its own unique characteristics and beautiful flowers. These varieties offer a range of color options for gardeners seeking to add a touch of beauty to their landscapes.
Some popular ones include:
- Acaranda mimosifolia is the the most popular Jacaranda variety in Australia, which produces striking purple flowers in late spring to early summer.
- Jacaranda acutifolia, which has smaller flowers and a more compact growth habit
- Jacaranda cuspidifolia, which has larger flowers and a spreading canopy
- Some gardeners also cultivate other varieties, such as “Alba” with white flowers and “Rosea” with pinkish blooms, which are less common.
In addition to their stunning flowers, Jacaranda trees also offer attractive foliage, with their leaves ranging from bright green to deep purple. Whether planted as a focal point in a garden or lining streets and parks, the Jacaranda tree is sure to captivate with its beauty and grace.

Jacaranda’s Blooming Season and Location in Australia
They are native to the tropical and subtropical regions of Central and South America. However, through time, they are now a common tree in other parts of the world for their ornamental value. While Jacarandas are not native to Australia, they have become naturalized in many parts of the country and are a common sight in parks, gardens, and along streets. One of the most famous locations to see Jacarandas in full bloom is in Sydney, where they line many streets and parks. The most iconic spot is arguably the Jacaranda tree tunnel in McDougall Street, Kirribilli, which attracts visitors from around the world.

In Australia, Jacaranda trees typically bloom in late spring to early summer, usually in November and December. The Jacaranda trees’ delicate flowers cascade down, creating a magical canopy that stretches for several blocks. It is truly a sight to behold and an experience that nature lover visiting Australia shouldn’t miss out.
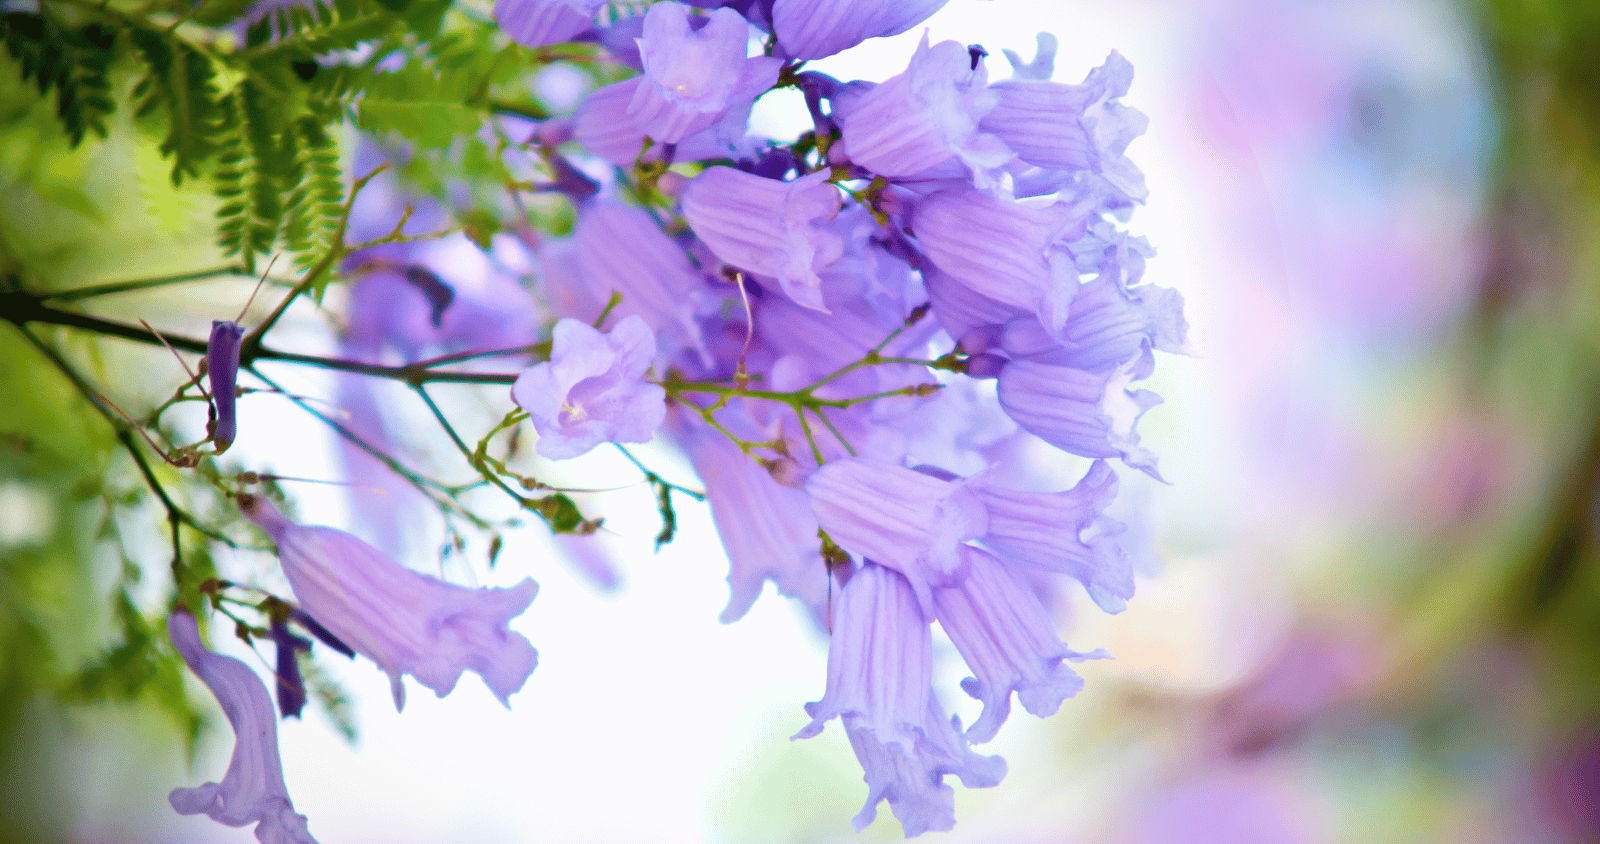
Symbolism and Cultural Significance of Jacaranda
In many cultures, the Jacaranda tree is a symbol of beauty, resilience, and renewal. Its vibrant flowers are often associated with good fortune and prosperity. In Australia, the blooming of Jacarandas is a sign that the end of the school year is near, making them a symbol of hope and new beginnings for students.
Other countries such as Brazil and Argentina, the Jacaranda tree holds religious significance and is often associated with spirituality and protection. In Brazil, it is believed that the tree brings good luck and wards off evil spirits. In Argentina, the Jacaranda tree is a symbol of national pride and is celebrated during the annual Jacaranda Festival. Overall, the Jacaranda tree holds deep cultural and symbolic meaning in various parts of the world, making it a cherished and revered tree.
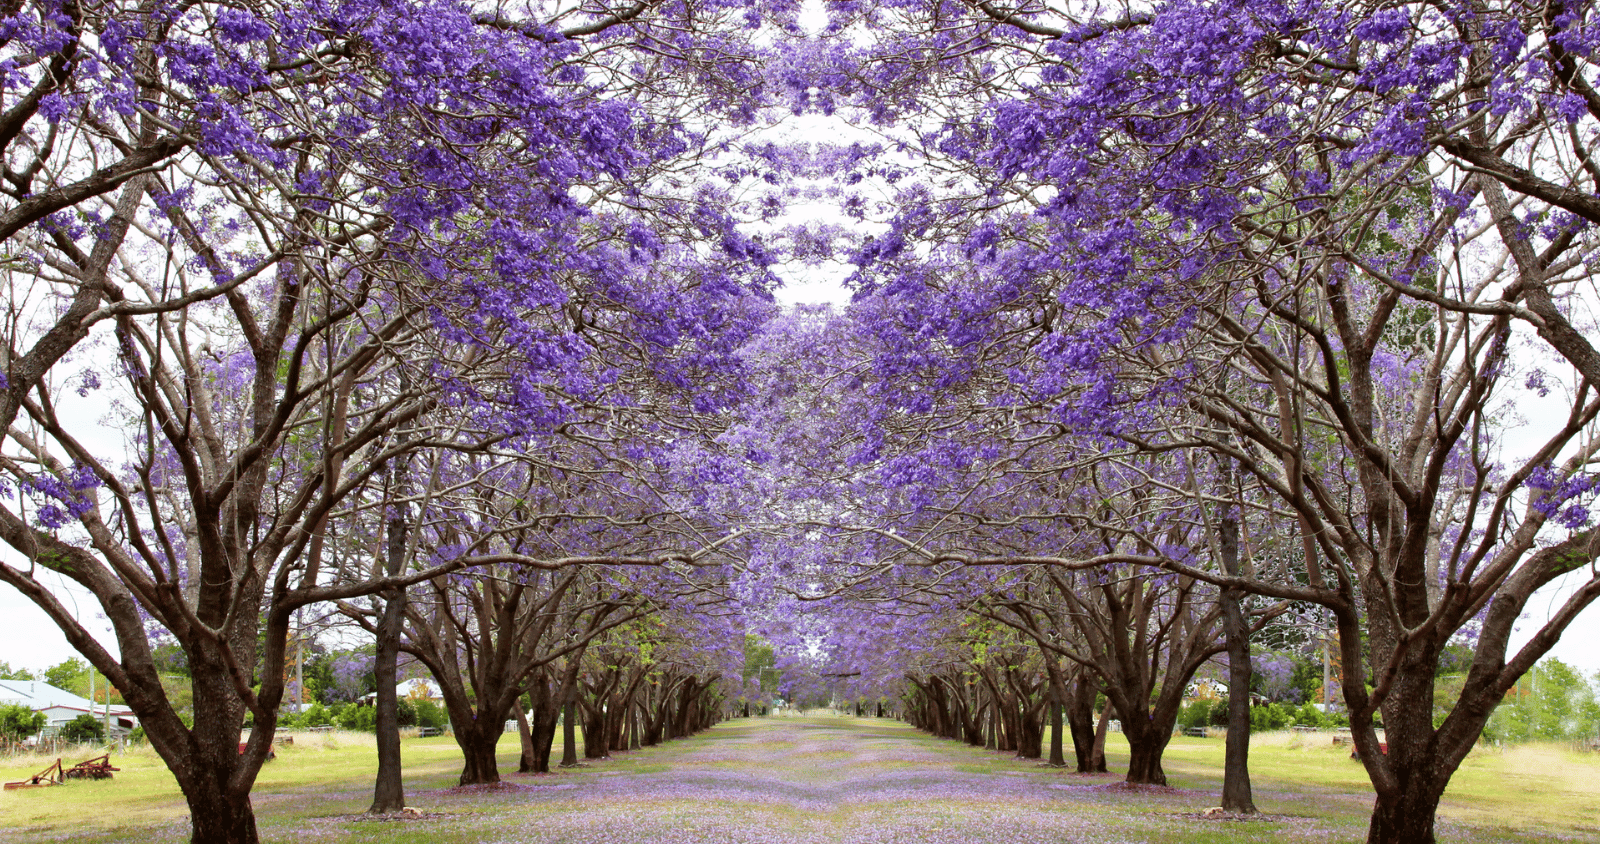
Fragrance and Blooming Period
Jacaranda blooms do not have a strong fragrance, but some people describe their scent as faintly sweet or reminiscent of grape soda. The blooming period in Australia typically lasts for several weeks, during which the trees are full of flowers. The vibrant purple flowers of the Jacaranda tree create a stunning spectacle, transforming the landscape into a picturesque scene. As the trees burst into bloom, you would see a carpet of purple petals in the streets of Australia, captivating the hearts of locals and tourists alike. The blooming period of the Jacaranda tree is a time of celebration and joy, as people gather to appreciate the beauty and marvel at nature’s artistry.
Ideal Growing Conditions of Jacaranda
Ideal Growing Conditions for Jacaranda trees include a sunny location with well-draining soil. These trees thrive in warm climates, such as those found in Australia, where they can soak up plenty of sunlight. They also require regular watering, especially during dry periods, to ensure their vibrant blooms continue to flourish. Additionally, Jacaranda trees benefit from occasional pruning to maintain their desired shape and promote healthy growth. With the right care and conditions, these magnificent trees can bring joy and beauty to any landscape.
Ideal Climate for Jacaranda and Weather Sensitivity
Jacaranda trees thrive in warm, humid climates and prefer full sun. They are not tropical trees, as they can tolerate mild frosts once established. In terms of weather, Jacarandas are sensitive to frost and are suitable for regions with mild winters. Moreover, they are sensitive to strong winds, so it is important to ensure their location is in a sheltered area.

Ideal Soil Types
Their species can adapt to various soil types but thrive in well-draining, slightly acidic to neutral soils. Avoid planting them in areas with clay or waterlogged soils, as this can lead to root rot and other issues. These trees are relatively low maintenance and can tolerate periods of drought.
Soil Improvement
Jacaranda trees prefer well-draining soil and do not tolerate heavy clay or waterlogged conditions. Amending the soil before planting can help ensure your Jacaranda thrives in its new home.
- If your soil is sandy, you can improve it by adding organic matter such as compost or well-rotted manure. Adding organic matter, such as compost or well-rotted manure, to sandy soil can help improve its water-holding capacity and nutrient content, creating a more suitable environment for Jacaranda trees. (If you just need a small amount of compost, this is a great option, if you need a larger quantity the best option is to contact your local soil supplier.)
- For clay soils, it is best to mix in coarse sand or perlite to improve drainage and prevent waterlogging (here is where you can get perlite from). Regularly testing the soil pH and adjusting it to a slightly acidic to neutral range can also promote optimal growth for Jacaranda trees (to find out what your soil pH is use this kit). Also, adding gypsum can help improve drainage. Gypsum helps to break up the heavy clay particles, allowing for better water drainage and root development. Additionally, it is important to avoid over-watering the Jacaranda tree, as this can lead to root rot. Regularly checking the moisture levels of the soil and adjusting watering accordingly will help to maintain the tree’s health and prevent issues.
Sunlight Requirements
Jacaranda trees require full sun to thrive, meaning they need at least 6 to 8 hours of direct sunlight per day. Insufficient sunlight can result in poor growth and fewer flowers. If you notice your Jacaranda struggling to bloom, consider whether it is receiving adequate sunlight.

How much water do jacaranda trees need?
While Jacaranda trees are moderately drought-tolerant once established, they perform best with regular watering, especially during dry periods. A general guideline is to provide about 20 to 50 mm of water per week when the tree is establishing. Raise or lower water depending on weather conditions and soil type.
Once established your Jacaranda may be able to thrive off only the rainfall it receives, with maybe some additional watering in the hottest months or during seasons of drought. Monitor your tree closely during hot, dry spells to ensure it remains healthy.
Fertilisation
Once established Jacaranda trees rarely need fertilsation. However, if you want to encourage faster growth or have very poor quality, sandy soils and want to supplement with additional nutrients then fertilisation will be helpful.
A balanced, slow-release fertiliser applied in spring and autumn is ideal. Avoid over-fertilizing, as this can lead to excessive foliage growth at the expense of flowers. Monitor your tree’s growth and adjust your fertilisation regimen as needed. (Here is a great balanced organic fertiliser that can be used on just about every plant)

How Fast Do Jacaranda Trees Grow?
Jacaranda trees are popular for their rapid growth, typically reaching heights of 10 to 15 meters (30 to 50 feet) with a spread of 5 to 8 meters (15 to 25 feet). Under optimal conditions, they can grow 2 to 3 meters (6 to 9 feet) per year. This fast growth rate makes them an attractive option for gardeners looking to establish a mature tree relatively quickly. With their ability to reach heights of up to 50 feet and provide ample shade, jacaranda trees are a great addition to landscapes, as long as the soil conditions are suitable.
Pruning Requirements
Jacaranda trees benefit from annual pruning to maintain their shape and size. The best time to prune is in late winter to early spring, before new growth begins. Use pruning shears (if you are looking for some really good shears, here are two great options depending on your budget: option 1 and option 2) or a pruning saw (if you are looking for a great folding saw, this is my recommendation) to remove dead or damaged branches and shape the tree as desired. Avoid over-pruning, as this can stress the tree and reduce flowering. If you accidentally over-pruned your Jacaranda or something similar occurred, this product helps the plant become more resilient to stress.
A common mistake people make is not pruning off low branches or crossing branches early on in the tree’s life. These branches will not create a well-shaped tree in maturity and will only take nutrients away from the other branches you will want to keep long-term. Early on, cut off any branches that won’t serve the long-term purpose of the plant. This will create a faster-growing and more aesthetic tree.

Common Pests and Diseases
Jacaranda trees are susceptible to a few common pests and diseases. It is important to monitor the tree regularly and take appropriate measures to control and prevent these pests and diseases to ensure the health and vitality of the jacaranda tree.
Common Pests
Common pests that can affect jacaranda trees include aphids, scale insects, and caterpillars. These pests can cause damage to the leaves and flowers of the tree. You can treat these pests with insecticidal soap or horticultural oil. Here is where you can find some horticultural oil; make sure to double check that it suits your goals.
Common Diseases of Jacaranda
In terms of diseases, jacaranda trees can be prone to root rot if the soil is not well-drained. Fungal diseases such as powdery mildew and leaf spot can also occur, especially in humid conditions. (Here is an organic fungicide that will help with Powdery Mildew and Black Spot.) Proper watering and good air circulation can help prevent these issues. To treat fungal diseases, you can apply fungicides to the tree as a preventative measure. It is important to regularly inspect the tree for any signs of disease or pests and take prompt action to address the issue. Additionally, maintaining overall tree health through proper fertilization and pruning can help prevent both diseases and pests from infesting the jacaranda tree.

Common Mistakes
Jacaranda trees can suffer from browning leaves. There may be various factors such as over-watering, nutrient deficiencies, or pests. Three common mistakes gardeners make with Jacaranda trees are:
- Over-watering: Jacaranda trees are susceptible to root rot if they are kept too wet. Allow the soil to dry out slightly between waterings.
- Improper pruning: Pruning at the wrong time or too aggressively can damage the tree and reduce flowering. Prune lightly and only when necessary.
- Planting in the wrong location: Jacaranda trees require full sun and well-draining soil. Planting in a shady or waterlogged area can lead to poor growth and flowering.
Propagation and Growth of Jacaranda
Jacarandas can be propagated from seeds or cuttings. Jacaranda trees can also be propagated through grafting, which can result in faster growth and more consistent flowering.
- Propagation from seeds is the most common method, and it is best to collect the seeds from a mature tree in the fall once they have dried on the tree. Soak the seeds in water for 24 hours before planting them in a well-draining potting mix. Keep the soil consistently moist until the seeds germinate, which usually takes about 2-4 weeks. Once the seedlings grow a few inches tall, you can transplant them into larger pots or directly into the ground. With proper care, Jacaranda trees can grow to be quite large, reaching heights of up to 40 feet or more. They have a fast growth rate, especially in the first few years, so regular pruning may be necessary to maintain their shape and size.
- Cuttings can be taken from young, healthy branches to propagate more Jacaranda trees. To take cuttings, choose a branch that is about 6 inches long and remove any leaves from the bottom half. Dip the cut end in rooting hormone and place it in a pot filled with moist potting soil. (We recommend using this rooting hormone to help root formation in your cuttings.) Keep the cutting in a warm and humid environment, misting it regularly to prevent it from drying out. After a few weeks, roots should start to form, indicating successful propagation. Once the cutting has established roots, it can be planted in its pot or directly into the ground.
- Grafting is also possible but less common. Grafting is a more complicated method of propagation and is typically only done by experienced gardeners or horticulturists.

Pollination and Dispersal
Jacaranda trees are pollinated by bees, butterflies, and other insects attracted to their nectar-rich flowers. Once pollinated, the trees produce long, bean-like pods that contain seeds. These seeds are dispersed by wind and water, allowing the tree to colonize new areas.
Lifespan and Maintenance
Jacaranda trees have a relatively long lifespan, often living for 50 years or more with proper care. To keep your tree healthy, ensure it receives adequate sunlight, water, and nutrients. Prune it regularly to maintain its shape and remove dead or damaged branches.
Dwarf Jacaranda and Bonsai
While there are no true dwarf varieties of Jacaranda, some cultivars have a more compact growth habit than others. These smaller varieties can be suitable for smaller gardens or for growing in pots. Jacaranda bonsai can be trained to stay small, but their ultimate size will depend on the specific variety and growing conditions.

Benefits and Medicinal Uses of Jacaranda
The wood of the Jacaranda tree is prized for its beautiful grain and is used in woodworking and furniture making. Its flowers are primarily valued for their ornamental beauty and are not widely used for medicinal purposes. However, in traditional medicine, Jacaranda leaves and bark have been used to treat various ailments, including fevers, inflammation, and gastrointestinal issues. It’s important to note that these uses are based on traditional knowledge and may not be supported by modern scientific evidence.
Disadvantages and Toxicity
One potential disadvantage of Jacaranda trees is their ability to produce large quantities of litter, including flowers, leaves, and seed pods, which can be a nuisance to clean up. While Jacaranda flowers are not considered toxic to humans, they can cause mild gastrointestinal upset if ingested in large quantities. However, its flower is an important food source for birds and other wildlife.
Jacaranda trees are a stunning addition to any landscape, with their beautiful flowers and graceful form. Whether you plant one for its aesthetic appeal or its cultural significance, a Jacaranda tree is sure to bring joy and beauty to your garden for years to come.
The post Everything You Need To Know About Jacaranda appeared first on Silverstone Gardening.
]]>Alternanthera is a diverse and visually striking genus of plants that can bring an array of colors to your garden. Whether you’re a seasoned gardener or just starting, Alternanthera’s versatility and low-maintenance nature make it an excellent choice for various landscaping purposes. With 80 to 200 species to choose from, you can find that these plants thrive in both sun and shade, allowing you to add vibrant hues to any corner of your garden. These plants are known for their unique foliage, with leaves ranging from deep burgundy to bright green, creating a stunning contrast when planted together. Additionally, Alternanthera’s ability to withstand drought and adapt to different soil types makes it an ideal choice for those looking for an effortless yet captivating garden.

Varieties of Alternanthera
With over 80 recognized species, this plant offers a wide range of choices for gardeners. Some popular varieties include:
- Alternanthera Little Ruby: Known for it’s deep burgundy foliage and low spreading habit. This is a hardy and very popular plant in Australian gardens.
- Alternanthera ficoidea (Joseph’s Coat): Known for its multicolored foliage, displaying shades of green, red, yellow, and pink. This variety adds a vibrant and eye-catching splash of color to any garden.
- Alternanthera dentata (Purple Knight): Renowned for its deep purple leaves, it adds a bold and dramatic touch to any garden. Another popular variety is Alternanthera reineckii (Cardinalis), which features vibrant red leaves that can add a pop of intense color to a garden.
- Alternanthera brasiliana (Brazilian Joyweed): Featuring vibrant green leaves, this variety is celebrated for its ability to withstand various weather conditions.
- Alternanthera dentata (Ruby Leaf): Another popular variety which features deep burgundy leaves that create a striking contrast when planted alongside other green foliage plants.
- Alternanthera reineckii (Red Leaf): Also a favorite among gardeners, with its vibrant red leaves that add a dramatic touch to any landscape. W
- Alternanthera amoena (Parrot Leaf): Another attractive option, with its green leaves adorned with purple undersides, creating an interesting contrast.
In Australia, the Little Ruby, Purple Knight and Brazilian Joyweed are particularly popular for their stunning colors and adaptability to local climates. Whether you prefer a more subtle or bold color palette, there is sure to be a variety of Alternanthera that suit your aesthetic preferences.

Leaf colors of Alternanthera
Alternanthera is renowned for its vibrant and diverse leaf colors. The leaves can display shades of green, red, yellow, pink, and purple, depending on the specific variety. Some varieties, like the Alternanthera reineckii, have leaves that start off green and gradually turn a deep red as they mature. Others, like Alternanthera dentata, have leaves that are a vibrant yellow, adding a pop of brightness to any garden. Alternanthera ficoidea ‘Partytime’ is a popular choice for its striking pink and green variegated leaves, creating a playful and whimsical look. No matter which variety you choose, the diverse leaf colors of Alternanthera are sure to add visual interest and beauty to any landscape.
Nature of Alternanthera: Evergreen, Annual, or Hardy?
While some may exhibit evergreen characteristics in warm climates, they are generally not considered hardy in colder climates. This means that they will not survive harsh and regular frosts and should be treated as annuals in those areas. However, they can be grown as perennials in warmer regions where they can withstand mild winters.

Ease of Cultivation: Is Alternanthera Easy to Grow?
Yes, it is relatively easy to grow. Alternanthera plants are known for their resilience and they can tolerate a wide range of soil types, from sandy to clayey, and can withstand hot climates if watered regularly.
Preferred Conditions for Alternanthera
Sun, soil, and weather
Aternanthera thrive in full sunlight but also tolerating partial shade. When selecting a location, aim for well-draining soil with a slightly acidic to neutral pH. These plants are adaptable to different soil types, including sandy and loamy soils, as long as there’s proper drainage. In terms of climate, it prefers warm and tropical conditions, making it well-suited for many regions in Australia.
Sunlight Requirements
For optimal growth, this plant typically needs at least 6 hours of direct sunlight per day. If the plant doesn’t receive enough light, you may notice signs such as reduced growth, leggy stems, and less vibrant foliage. Therefore, it is crucial to choose a location for planting that receives ample sunlight.

Drought tolerance and watering needs
Are Alternantheras Considered Drought-Tolerant?
While Alternanthera can withstand some drought conditions once established, it generally prefers consistently moist soil. Adequate watering is crucial, especially during dry periods. Without proper watering, the plant may become stressed and exhibit signs of wilting or leaf drop.
If your Alternanthera is wilting water immediately, they will often recover if you get water on them quickly, but will die if left too long without water.
It is important to keep the soil evenly moist, but not waterlogged, to ensure the health and vitality of this plant. Regularly checking the moisture level of the soil and adjusting the watering schedule accordingly is vital for the plant’s overall well-being.
Weekly Watering
To maintain moisture, it generally needs around 25–30 mm of total water per week. Adjust this based on local climate conditions and soil moisture retention. In extremely hot and dry climates, it may be necessary to increase the amount of water to prevent the plant from drying out. Conversely, in cooler and more humid climates, it may be necessary to decrease the amount of water to avoid waterlogging the soil. By regularly monitoring the moisture level of the soil and adapting the watering schedule accordingly, the Alternanthera will be able to thrive and maintain its overall well-being.
Indoor vs. outdoor cultivation
While Alternanthera is primarily an outdoor plant, some varieties may be suitable for very well lit indoor spots. If atempting to grown indoors place next to a large window so the plant gets some direct sunlight through the day. Additionally, providing adequate drainage in containers is essential to prevent waterlogging and root rot. Regular fertilisation, as per the fertilising guide below, will also help a lot with the reduced light condition. Ultimately, whilst they have beautiful foliage most varieties are going to struggle in indoor conditions.

Propagation Methods: Growing Alternanthera from Cuttings and Seeds
Growing from cuttings
You can easily propagate Alternanthera from cuttings. Place the cuttings in well-draining soil ensuring they have a node (where leaves and roots emerge). Use a rooting hormone if you have access to some to help root formation in your cuttings. Keep the soil consistently moist until the cuttings establish roots, use a liquid fertiliser like Roots to encourage those roots to grow faster and stronger. Once the roots have developed, you can gradually reduce the watering frequency. It’s important to keep the cuttings in a warm and humid environment to encourage healthy growth.
Growing from seeds
Starting Alternanthera from seeds involves sowing them in a seed-starting mix. Keep the seed-starting mix consistently moist until the seeds germinate. Once the seedlings have developed a few leaves, you can transplant them into individual pots or a garden bed. Provide them with ample sunlight and water regularly to promote their growth. It’s important to note that growing from seeds may take longer than propagating from cuttings, but it can be a rewarding and cost-effective method of expanding your Alternanthera collection.

Growth rate and height
Speed of Growth
This plant tends to grow relatively quickly, especially under favorable conditions. Exact growth rate will depend on the variety and how suitable the conditions are. In good conditions Alternanthera Little Ruby can grow 40-60cm in a year, Altenanthera dentata may grow up to 1m in a year. Its fairly rapid growth rate makes it an ideal choice for filling in empty spaces in your garden or creating a vibrant border.
Height Growth
The height of Alternanthera varies by species and variety but can range from 30cm to 1 meter in a year on average. Some species of Alternanthera, such as Alternanthera dentata, can grow up to 1 meter in just a year, making it a fast-growing plant for filling in empty spaces in your garden.

Pruning Alternanthera
Pruning for Alternanthera will depend a lot on your goals for the plant.
Frequency and timing
Thick boarders: If you want a thick boarder plant pruning is essential to keep it in shape and encourage bushier growth. For beginners, a good rule of thumb is to prune every 4 weeks during the growing season, from late spring to early autumn.
Stand alone plants: If you have it on its own, like in a pot or filling in a bare spot in your garden, then a single annual prune is likely all that will be needed.
Tools for pruning
All you will need to prune Alternanthera is a hedge trimmer or set of sheers. For regular pruning simply hedge to the desired shape. For an annual prune focus on removing dead or leggy stems to promote a more compact and visually appealing appearance.
Soil Improvement for Alternanthera
Ideal Soil Type
Alternanthera prefers well-draining soil. If your soil is too sandy, consider incorporating organic matter, like compost, to enhance water retention. For clayey soil, adding sand and organic matter can improve drainage.
Fertilising Alternanthera
Alternanthera often don’t need fertilisation if the soil conditions are perfect. However, many people may not have those perfect conditions so these products will help.
First things first, make sure your Alternanthera is getting a full 25-30mm of water each week. If it is not getting enough water no fertiliser will be able to overcome that problem.
If you want to increase drought tolerance: Seavival, AquaTurf and Roots are the way to go. AquaTurf will help water penetrate into the soil allowing the plant to make the most of the water that is there. Roots will help encourage healthy root growth which is essential in dry and hot conditions. Finally Seavival will help the overall health of the plant, increasing it’s tolerance for any stress including heat and drought. Apply every 4 weeks.
If you want to increase leaf growth: Nourish is a liquid fertiliser that will give the plant the nutrients its needs to grow quickly, without over feeding the plant. If you are wanting rapid growth then apply every 2 weeks. Here is another option for an awesome liquid fertiliser and soil conditioner.

Pests and diseases
Common Pests
Aphids and spider mites are common pests that can affect Alternanthera. For beginners, using insecticidal soap or neem oil can help control these pests. Here is where you can find some neem oil.
Snails can also hide under Alternanthera and eat the leaves, simple snail baits should do the trick.
Common Diseases
Whilst not very common fungal diseases, such as powdery mildew, may affect Alternanthera. (Here is an organic fungicide that will help with Powdery Mildew.) Adequate spacing and good air circulation can prevent such issues. If diseases persist, consider using fungicides.

Diagnosing Issues: Why is My Alternanthera Dying?
Several factors could contribute to the decline of Alternanthera. Common issues include overwatering, inadequate sunlight, or poor soil drainage. Assess the plant’s environment, adjust watering practices, and ensure it receives the required sunlight for a potential revival.
Common Mistakes with Alternanthera
- Inadequate Light: You will know this by leggy growth. Ensure your alternanthera receives sufficient sunlight to maintain vibrant colors and healthy growth.
- Overwatering: While consistent moisture is vital, avoid overwatering to prevent root rot.
- Neglecting Pruning: Regular pruning is essential for a neat and visually appealing display.
Additional Questions About Alternanthera
Nature of Alternanthera: Herb or Shrub?
Alternanthera falls under the category of herbaceous plants. While it has a bushy and compact growth habit, it is not considered a shrub. This distinction is important for understanding its care requirements and growth patterns. Herbaceous plants, like Alternanthera, have soft, flexible stems and typically die back to the ground during harsh winters. This means that they require less maintenance compared to shrubs, which have woody stems and maintain their structure year-round.
Alternanthera as a Tropical Plant
Yes, Alternanthera is indeed a tropical plant. It thrives in warm climates and is well-suited for tropical regions, making it a popular choice for gardens in places like Australia. The vibrant colors and lush foliage of Alternanthera make it a perfect addition to any tropical garden. Its ability to tolerate high heat and humidity makes it a resilient choice for hot climates. Gardeners in Australia and other tropical regions can enjoy the beauty of Alternanthera year-round, as it can withstand the harsh conditions of these areas. With proper care and attention, a garden filled with Alternanthera can create a stunning and inviting space for relaxation and enjoyment.

Uses of Alternanthera
Alternanthera serves various purposes in gardening and landscaping. While it is primarily grown for its ornamental value, adding a burst of color to gardens, some varieties can also be used for ground cover. For example, in landscaping, Alternanthera can be used as a colorful border plant to delineate different sections of a garden or to create eye-catching patterns and designs. Additionally, some varieties of Alternanthera can be planted as ground cover to prevent soil erosion and suppress weed growth, making it a practical and visually appealing choice for gardens and landscapes.
Edibility and Poisonous Varieties
While Alternanthera is not typically grown for consumption, some varieties may have culinary applications. For example, Alternanthera dentata, also known as “Joseph’s Coat,” is sometimes used in traditional dishes in certain cultures. Alternanthera caracasana, commonly known as Sissoo spinach or Brazilian spinach, is recognized for its potential health benefits. Rich in nutrients, it’s believed to have antioxidant properties, contribute to heart health, and support overall well-being.
However, it is important to note that not all varieties of Alternanthera are safe for consumption. It’s essential to consult with a healthcare professional for personalized advice. Some varieties can be toxic if ingested, so it is crucial to do thorough research and consult with experts before using any variety of Alternanthera for culinary purposes. Notably, some species, like Alternanthera ‘Party Time,’ are grown for ornamental purposes and are not intended for consumption. Always exercise caution and research before consuming any plant.
Incorporating Alternanthera into your garden can be a rewarding experience, bringing a burst of color and easy-to-manage beauty. Whether you’re a beginner or an experienced gardener, these tips will help you cultivate a thriving and visually appealing Alternanthera garden.
The post Everything You Need To Know About Alternanthera appeared first on Silverstone Gardening.
]]>A Distinctive Australian Native Beauty
Adenanthos, commonly known as Woolly Bush, is an enchanting Australian native plant that holds a unique charm for beginner gardeners. It gets its name from it’s super soft leaves that almost feel like wool.
Its distinctive appearance, vibrant flowers, and resilience make it an excellent choice for those looking to add a touch of Australian beauty to their gardens. In this comprehensive guide, we’ll walk you through everything you need to know about Woolly Bush – from varieties and growing conditions to maintenance tips and common pitfalls.
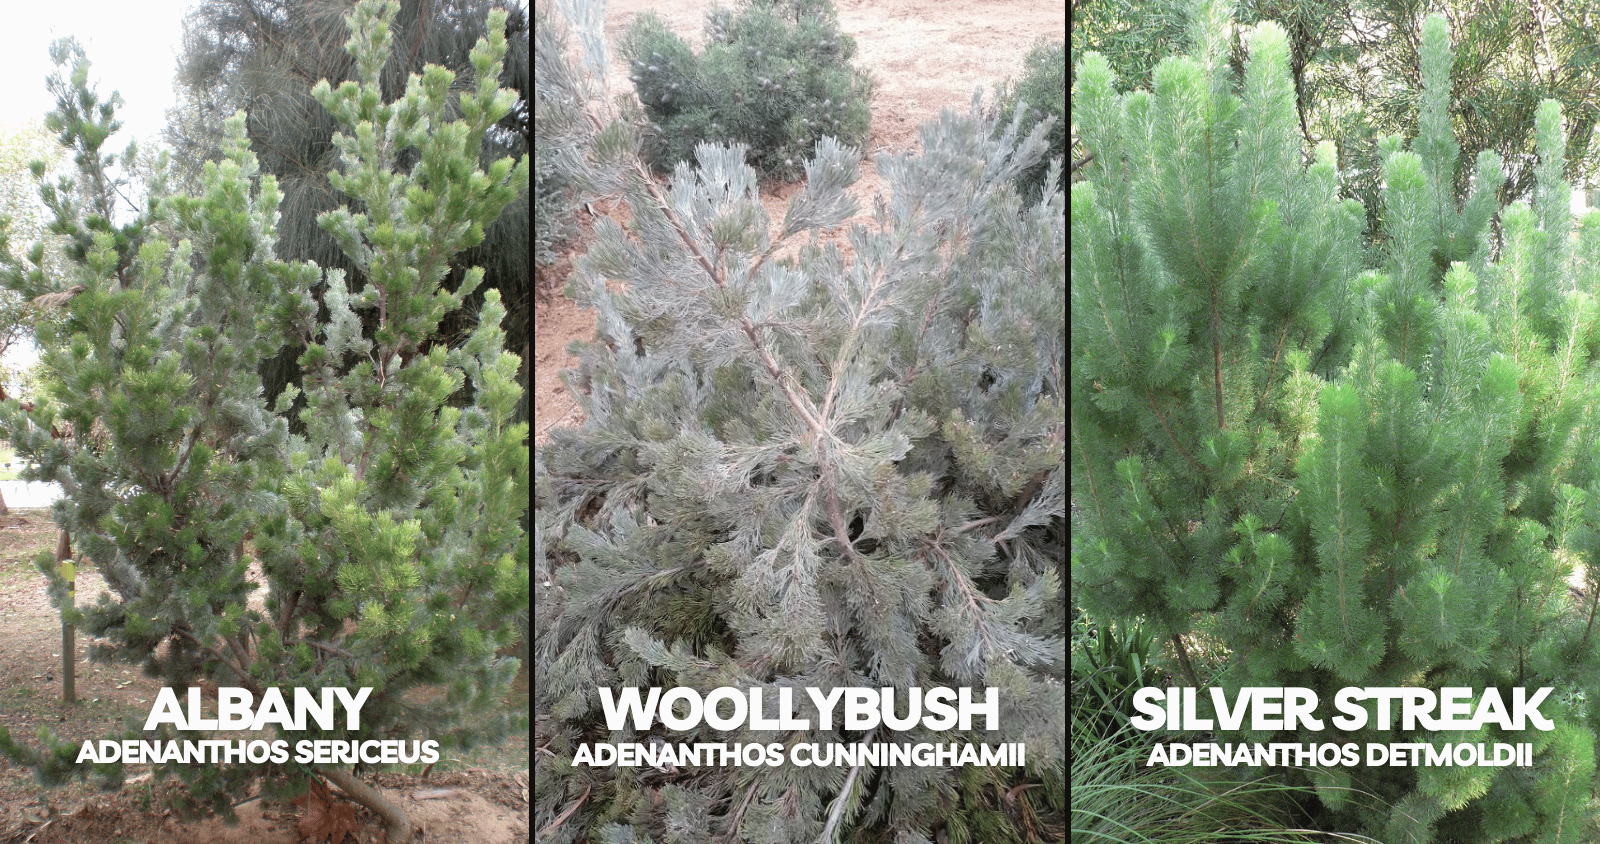
Varieties of Woolly Bush – Adenanthos
As a beginner, it’s exciting to explore the various varieties of Woolly Bush. Adenanthos sericeus, Adenanthos cunninghamii, and Adenanthos detmoldii are popular choices in Australia, each offering unique features. These varieties differ in size, foliage texture, and flower colors, providing a wonderful array of options for your garden.
Adenanthos sericeus, also known as Albany woolly bush, is a larger variety that can grow up to 3 meters tall. Its silvery-gray foliage is soft and woolly, giving it a unique texture that adds interest to any garden. Adenanthos cunninghamii, or woollybush, is a medium-sized variety that reaches around 2 meters in height. Its leaves are narrower and more compact, creating a dense and bushy appearance. Lastly, Adenanthos detmoldii, commonly called Albany woollybush ‘Silver Streak’, is a smaller variety that only grows to about 1 meter tall. Its foliage is silvery-white with dark green streaks, making it a striking addition to any garden. With these different varieties, you can mix and match to create a stunning display of colors, textures, and heights in your garden.
Growing Conditions
Woolly Bush is a forgiving plant that thrives in well-drained soils and basks in sunlight. Whether you have sandy or loamy soil, this adaptable plant can make itself at home. It’s known to withstand coastal and inland conditions, making it a fantastic choice for beginners facing different climates. Woolly Bush is also quite hardy against frost, adding to its beginner-friendly nature.
Its ability to withstand frost makes it a popular choice for gardeners in colder regions. Additionally, the Woolly Bush is a low-maintenance plant, requiring minimal pruning and care. It can grow to be quite tall, reaching heights of up to 10 feet, providing a beautiful backdrop or focal point in any garden. The unique texture of its leaves adds an interesting dimension to the overall aesthetic, creating a visually appealing landscape. Furthermore, the Woolly Bush is known for attracting various pollinators, such as bees and butterflies, making it an excellent choice for those looking to support local ecosystems. Overall, this versatile and resilient plant is a wonderful addition to any garden, offering beauty and ease of care for gardeners of all levels of experience.
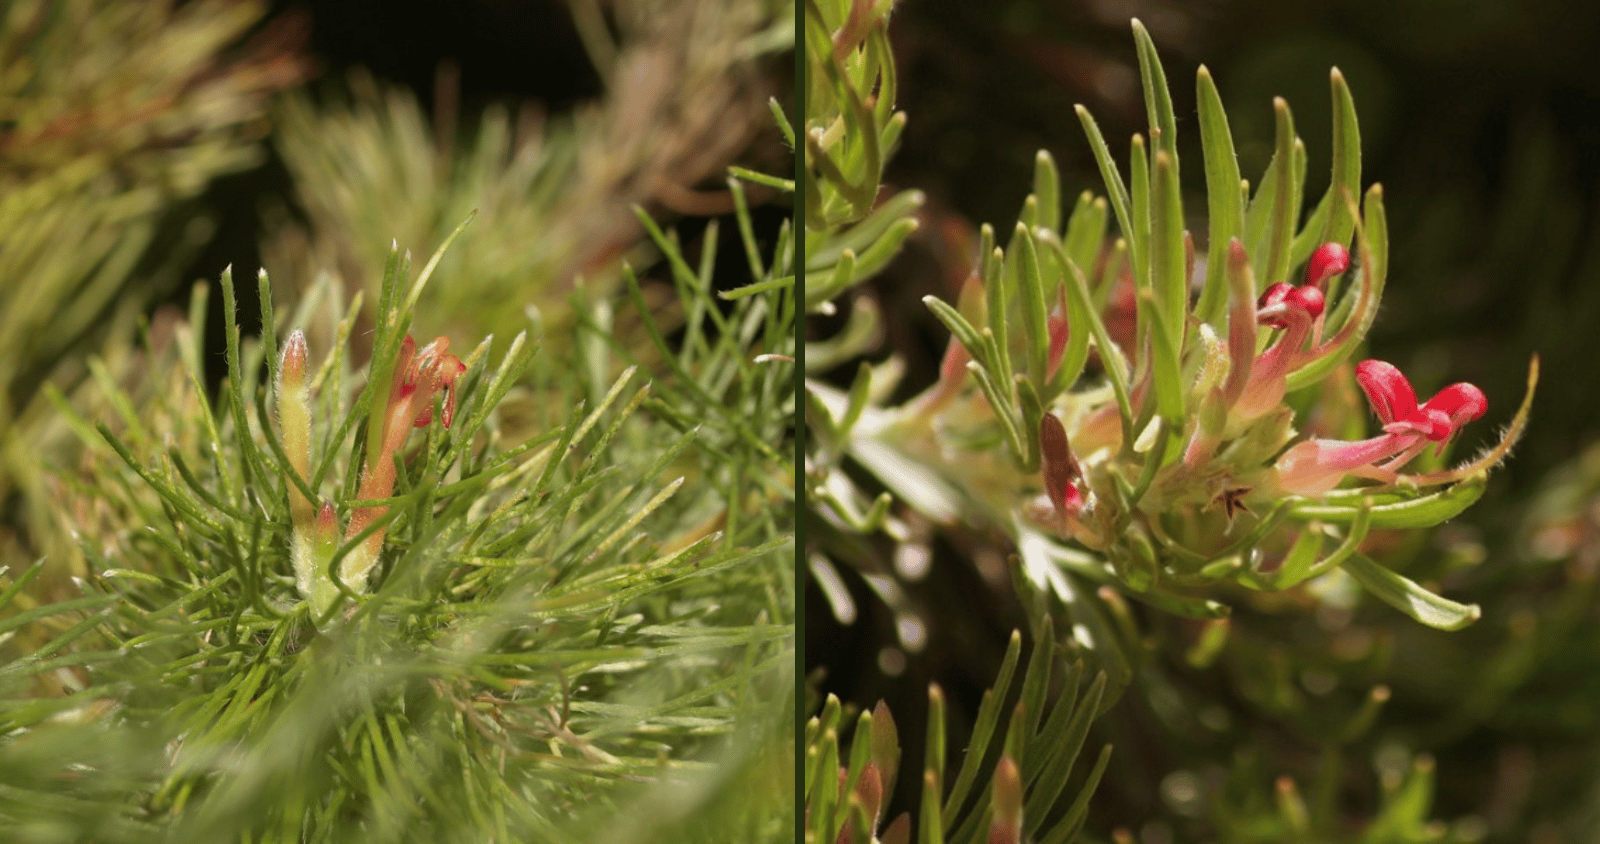
How big to Woolly Bushes grow?
Typically, a Woolly Bush can grow to a height of 2 to 4 meters, depending on the specific variety. It can be hedged to keep the plant to a specific height to suit your garden if needed.
How much sunlight do Woolly Bushes need?
Woolly Bush’s love for sunlight. Aim to provide your plant with at least 6-8 hours of sunlight each day. As an Australian native it can handle the harsh sun and hot weather.
If you notice sparse foliage, elongated stems, or fewer flowers, it might be an indication that your Woolly Bush is not receiving enough sunlight. It is also common for a Woolly bush that is planted on the south side of a house to grow out towards the light, which often makes the plant look asymmetrical and is not what most people want.
Whilst it is hard to move a Woolly Bush once planted that is often the only way to improve it’s health if it is not thriving in a shaded position. Creating an optimal environment for your Woolly Bush will not only ensure its health and growth but will also attract butterflies to your garden.
Butterflies are known to be attracted to bright sunlight, so providing your plant with ample sunlight will encourage butterflies to visit and lay their eggs. By adjusting the placement of your Woolly Bush, you can ensure that your plant receives the necessary sunlight it needs, making it an ideal habitat for butterflies.
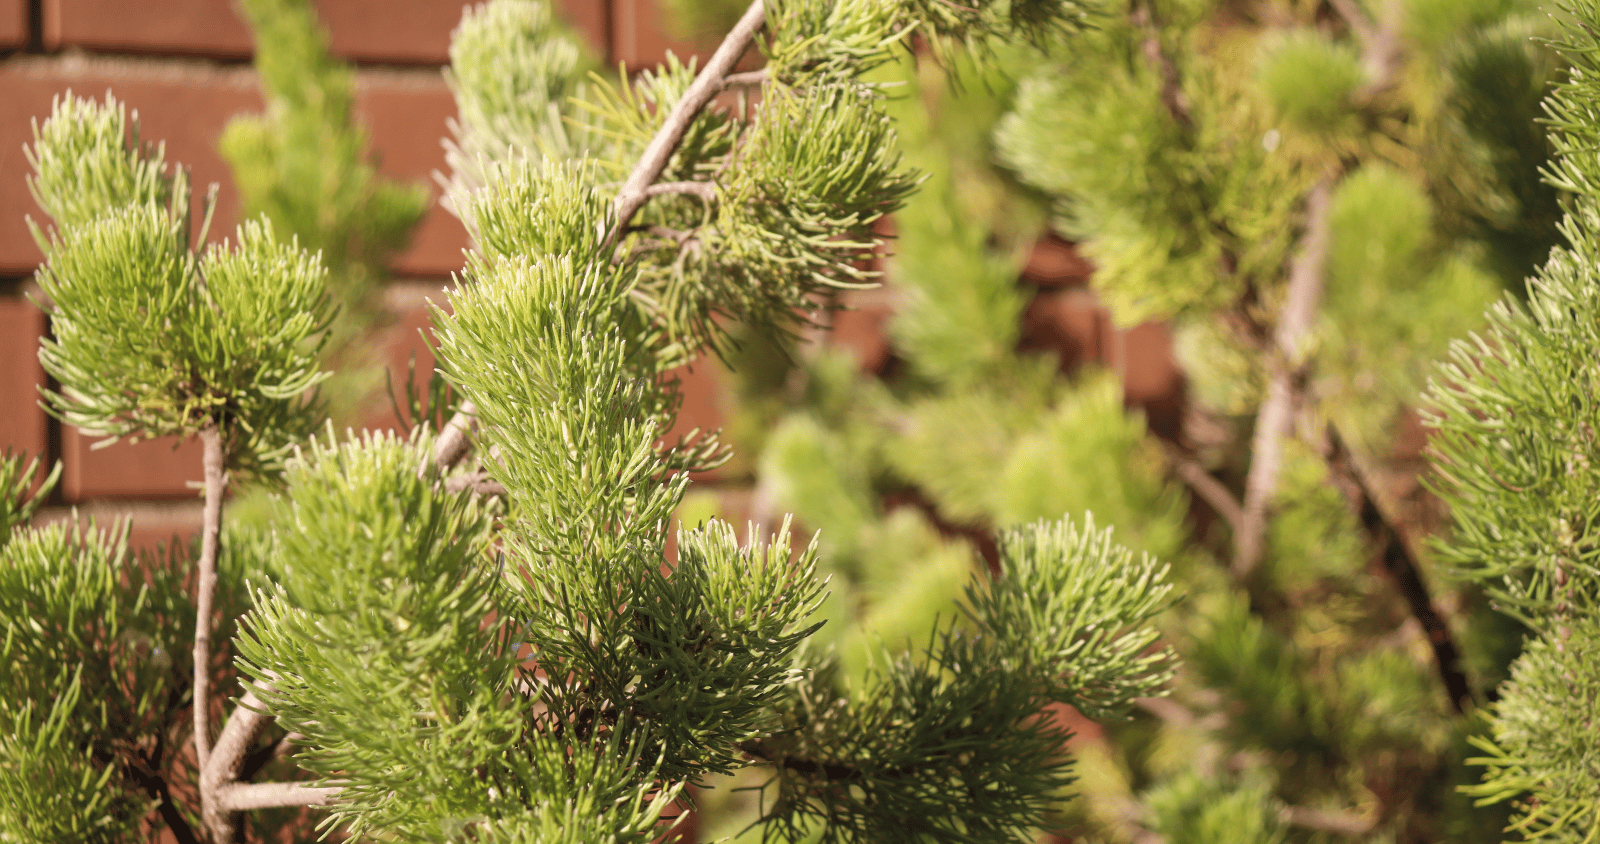
Drought Tolerance and Watering
Drought Tolerance
Woolly Bushes are quite drought-tolerant once established. This means you won’t need to worry too much about water, making it a low-maintenance option. However, it’s important to note that even though Woolly Bush is drought-tolerant, it still requires regular watering during its initial establishment period. Once the plant has developed a strong root system, it will be better equipped to withstand periods of drought and require less frequent watering.
Weekly Watering Needs
On average, Woolly Bush requires about 20mm of water per week. However, always keep an eye on your plant, adjusting watering based on factors like soil type, climate, and local weather conditions. It’s also worth mentioning that overwatering can be detrimental to the health of the Woolly Bush, so it’s important to ensure proper drainage and avoid waterlogged soil. Additionally, mulching around the base of the plant can help retain moisture and reduce the need for frequent watering.
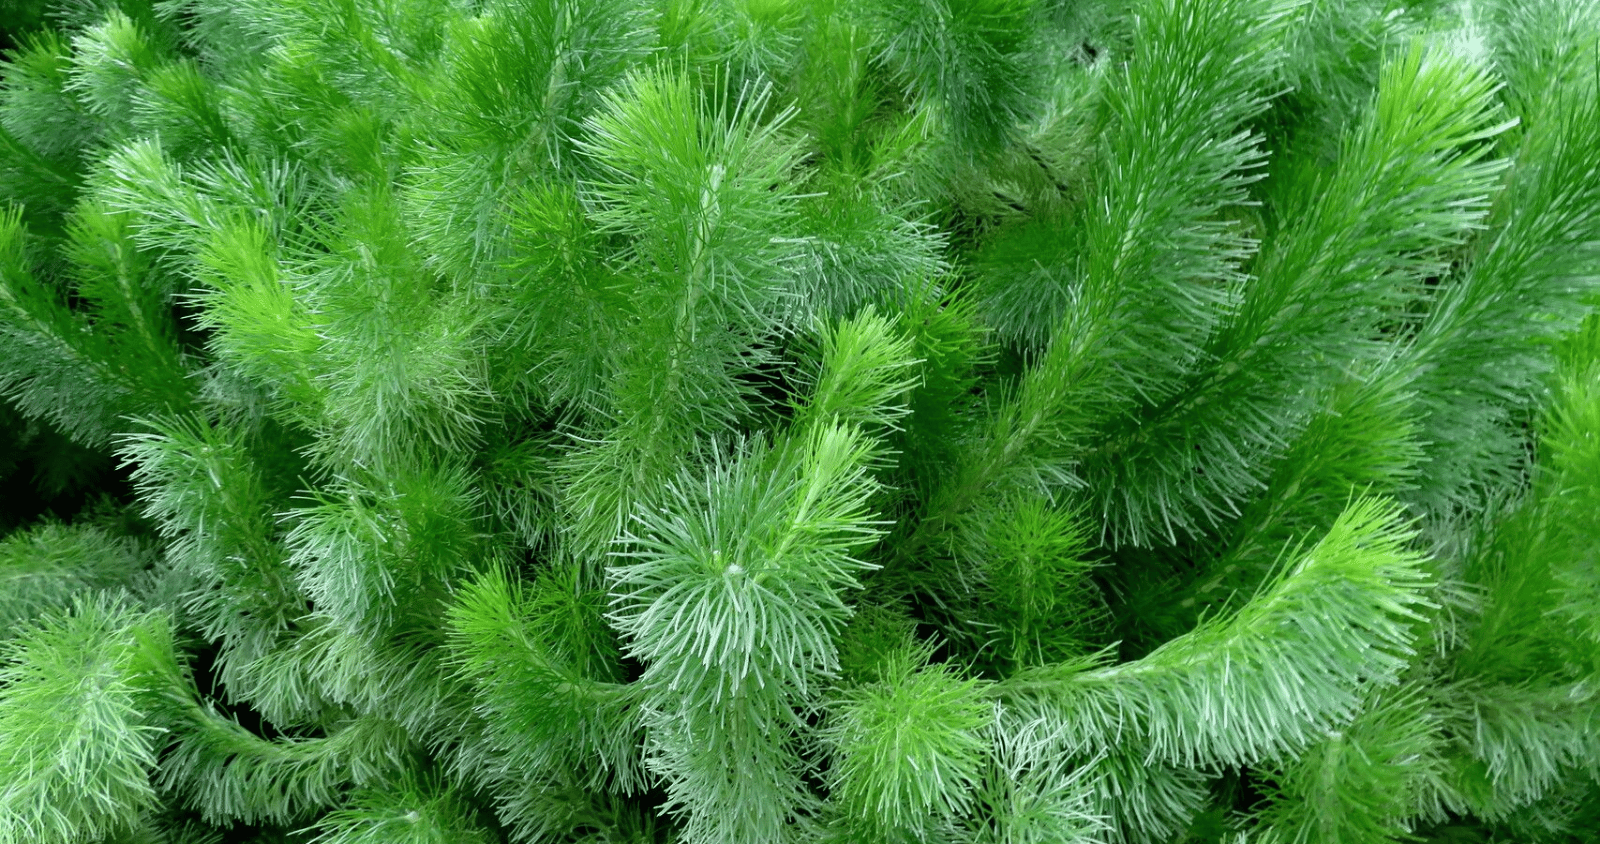
Pruning Woolly Bush – Adenanthos
Pruning Frequency
Typically an annual pruning session, in late winter or early spring, is all that is needed for Woolly Bushes. However, if you are trying to maintain a more formal style hedge then hedging every 8-12 weeks will be more beneficial.
How to do an annual prune on a Woolly Bush:
The first thing to do is to remove any dead or damaged branches, as well as any overcrowded or crossing branches. This will help maintain the overall shape and health of the Woolly Bush plant. Additionally, pruning can also stimulate new growth and promote a bushier appearance. Regular pruning of the Woolly Bush plant can also help prevent diseases and pests from infesting the plant, as well as improve air circulation within the foliage.
How to hedge a Woolly Bush:
The first thing to know is that Wooly Bushes are actually rather difficult to hedge. Their soft/fine leaves are hard to cut if you have blunt or cheap equipment. The honest truth is that these plants are not best suited as a formal hedge with sharp/crisp lines, but rather an informal hedge.
To hedge a Woolly Bush make sure your hedge trimmer is sharp. If you are a beginner you may want to set up a string line to help keep your cuts straight. Keep the blade speed of your hedge trimmer fast and move your trimmer back and forth over the hedge creating multiple passes, this will give a much cleaner finish then one pass only.
Best Time to Prune
Late winter or early spring is the ideal time for pruning Woolly Bush. This helps stimulate new growth and maintains a compact, well-shaped plant. Pruning during this time also allows the plant to recover before the onset of warmer weather, reducing the risk of stress or damage. It is important to avoid pruning during periods of extreme heat or cold, as this can further stress the plant and hinder its ability to heal properly. (This product is great for helping with heat stress or frost, best applied before the stress but can also help after or during a heat wave)
However, if you are pruning to remove dead, damaged or unwanted limbs you can do this any time of the year.
Pruning Tools
For remove dead or damaged branches and shape your Woolly Bush, a hand saw or chainsaw is all you will need. (If you are looking for a great folding saw, this is my recommendation.)
For regular hedge trimming, a telescopic or long handled hedge trimmer will be best as it allows you to reach the taller parts of the plants without a ladder.
Additionally, it is recommended to disinfect pruning tools before and after use to prevent the spread of diseases. Remember to always prune back to a healthy bud or lateral branch, making clean cuts at a slight angle to encourage proper healing.

Growth Rate and Soil Improvement
Growth Rate
Woolly Bush have a moderate growth rate, reaching its full height within a few years. On average, it can grow 30cm- 100cm per year.
If you want to improve the growth rate of your Woolly Bush, plant it in well-draining soil that is rich in organic matter. This will help to ensure that the plant receives the necessary nutrients and moisture for healthy growth. Additionally, regular fertilisation with a balanced fertiliser can further promote growth and overall plant health.
Ideal Soil Type
Woolly Bush is not too picky about soil. Well-drained sandy or loamy soils work best. Focus on good drainage to avoid waterlogging, which can be detrimental to your plant. If you live in an area with heavy clay soil, consider amending it with compost or sand to improve drainage. Another important factor to consider is the pH level of the soil. Woolly Bush prefers slightly acidic to neutral soil, so testing and adjusting the pH if necessary can also benefit its growth. To find out what your soil pH is use this kit.
Improving Sandy Soil
To boost sandy soil, add organic matter like compost or well-rotted manure. If you just need a small amount of compost, this is a great option, if you need a larger quantity the best option is to contact your local soil supplier. This improves water retention and nutrient availability. Additionally, incorporating mulch into the soil can help retain moisture and prevent erosion. Another option is to plant cover crops, such as legumes, which can add nitrogen to the soil and improve its overall fertility.
Improving Clay Soil
For clayey soils, mix in coarse sand or organic matter to enhance drainage and aeration. This prevents waterlogged conditions that can harm your Woolly Bush. In addition, adding gypsum to clay soil can help break up compacted soil particles and improve its structure. This allows for better root penetration and nutrient uptake by the Woolly Bush. It is also important to avoid over-watering clay soil, as this can lead to waterlogged conditions and root rot.
Fertilising Woolly Bush – Adenanthos
Do Wooly Bushes Need Fertilising?
Typically the answer is no. Woolly Bushes can do well even in poor quality soils as long as they get enough light and water. However, if you want to increase the growth rate of your Woolly Bush then fertilising will help you achieve that goal.
What Fertiliser Should I Use For Woolly Bush?
Use a slow-release, low-phosphorus fertilizer during the growing season. This will provide a steady supply of nutrients to the Woolly Bush without risking over-fertilization.
Personally, I would use All Rounder, putting down one large handful for big plants, and half a handful for smaller plants placed around the drip line.
This fertiliser has two types of controlled-release Nitrogen which will encourage new growth for 8-12 weeks, most cheaper granule fertilisers may only last 4-6 weeks. It also has a good amount of Potassium which helps with the general health of the plant, is low in Phosphorus, and has a huge number of trace elements, much more than most fertilsers have. In my opinion this is a much better rounded fertiliser than what you commonly get at large hardware stores.
Whilst this is marketed as fertiliser for lawns, don’t get too caught up in the marketing. Remember that lawns and shrubs are both foliage plants, so deep green colour and healthy growth is the goal, this fertiliser will do both. This fertiliser will also work well with other hedges and many other foliage plants like indoor plants and obviously lawns.
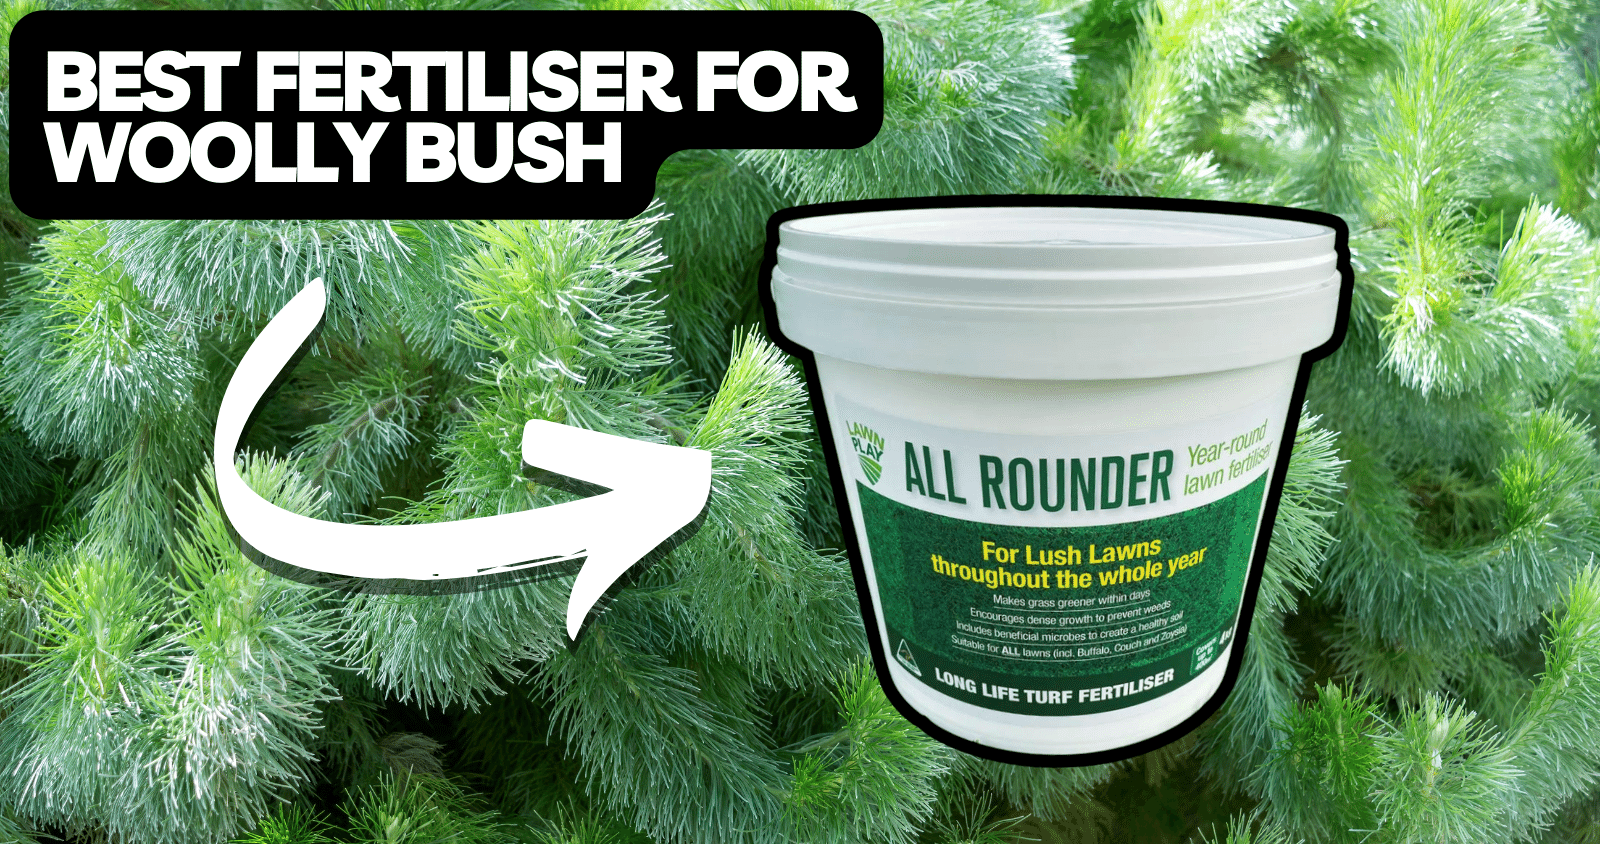
When Should I Fertilise Woolly Bush?
You can apply fertiliser any time of the year, but the most effective time will be in early spring.
How Often Should I Fertilise Wooly Bush?
As mentioned before, once your Wooly Bush is established it probably wont need fertiliser.
However, if you are trying to encourage faster growth, then I would apply All Rounder once every 8 weeks, but I would only do 3 applications a year. Once in September, December and February.
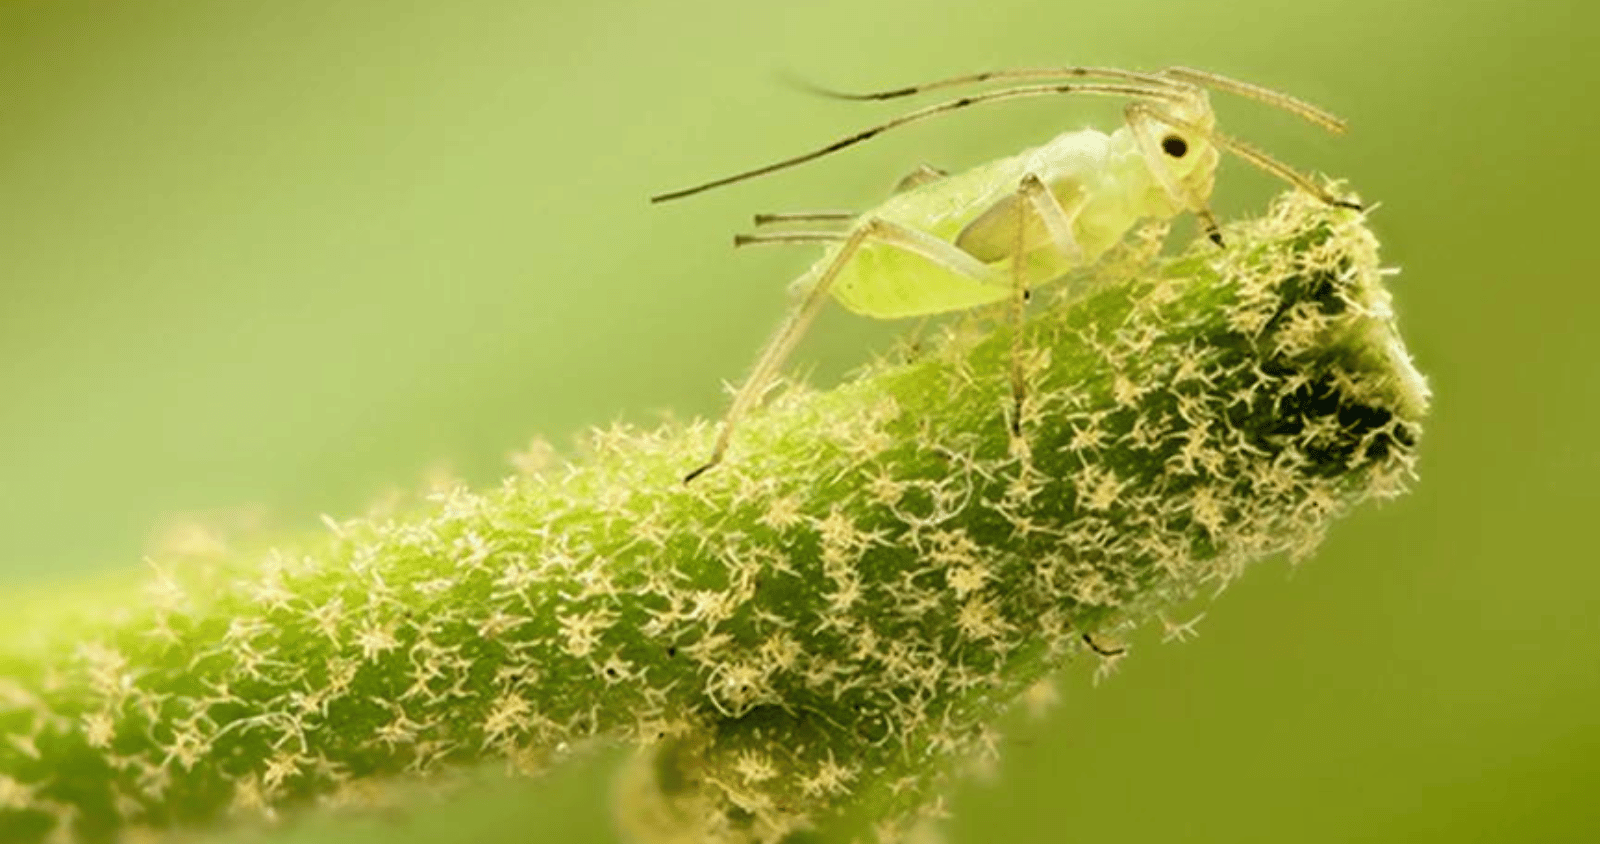
Common Pests and Diseases
Pests
While Woolly Bush is generally pest-resistant, beginners should keep an eye out for aphids and scale insects. Treat infestations with insecticidal soap or neem oil (here is where you can find some neem oil). These pests can be controlled by regularly inspecting your Woolly Bush and promptly addressing any infestations. Additionally, practicing good garden hygiene, such as removing fallen leaves and debris, can help prevent pest outbreaks.
Diseases
Root rot is a potential issue, particularly in poorly drained soils. Ensure proper drainage to prevent waterlogged conditions, reducing the risk of root rot. In addition, fungal diseases such as powdery mildew and leaf spot can affect Woolly Bush. (Here is an organic fungicide that will help with Powdery Mildew and Black Spot.) To prevent these diseases, avoid overhead watering and provide adequate air circulation around the plant. If necessary, apply a fungicide according to the manufacturer’s instructions. Regularly monitoring the plant for any signs of disease and taking prompt action can help maintain the health of your Woolly Bush.
Common Mistakes with Woolly Bush – Adenanthos
- Overwatering: Beginners, resist the urge to overwater. Ensure well-drained soil to keep your Woolly Bush happy.
- Insufficient Sunlight: Plant your Woolly Bush in a sunny spot to encourage healthy growth and flowering.
- Inadequate Soil Preparation: Improve your soil before planting to create a comfortable home for your Woolly Bush.
- Improper Fertilisation: Use a low-phosphorus fertilizer and avoid excessive use to prevent nutrient imbalances.
How do you propagate Adenanthos?
Propagation is commonly achieved through seed germination or semi-hardwood cuttings. Seeds should be sown in well-draining potting mix, and cuttings can be taken during the growing season, usually spring or early summer.
With proper care, these methods can yield new plants to share or enhance your garden. When propagating Adenanthos, it is important to provide the right conditions for seed germination or semi-hardwood cuttings. Seeds should be kept moist but not waterlogged, and cuttings should be placed in a well-draining rooting medium. (We recommend using this rooting hormone to help root formation in your cuttings.) It is also helpful to provide bottom heat for faster root development. With patience and proper care, you can successfully propagate Adenanthos and enjoy the satisfaction of growing your own plants.
How Long Do Woolly Bush Live?
The lifespan of Woolly Bush can vary based on factors such as growing conditions, care, and specific variety. Generally, with proper care, Woolly Bush can live for several decades, making it a long-term and rewarding addition to your garden.
The key to ensuring the longevity of your Woolly Bush is to provide it with the right growing conditions. This plant thrives in well-drained soil that is rich in organic matter. It prefers a sunny location, but can tolerate some shade. Regular watering is essential during the establishment period, but once established, it is relatively drought-tolerant. In terms of care, pruning is necessary to maintain its desired shape and size. Removing dead or damaged branches and thinning out the plant will promote air circulation and prevent diseases. Additionally, applying a slow-release fertilizer in early spring can provide the necessary nutrients for healthy growth. By following these guidelines, you can enjoy the beauty and longevity of your Woolly Bush for years to come.
The post Everything You Need To Know About Woolly Bush – Adenanthos appeared first on Silverstone Gardening.
]]>